Leaderboard


Popular Content
Showing content with the highest reputation on 04/09/26 in all areas
-
Luxembourg!1 point
-
You can still run VMs in Hexos, but you need to go to the Truenas Gui. VMs will only be supported in the future in the Hexos GUI. But Proxmox is likely the better OS for your purposes and just put Hexos in a VM. 🙂 If you run Hexos as the OS, the 64GB SSD is more then enough. If you want to run Proxmox then get a bigger SSD (512GB or more) and make sure it's not connected to the same controller ass your HDDs. (Best is getting a NVME SSD anyway for Proxmox and the VMs). If you use Hexos as OS, you need 3 SSDs (1 for the boot drive, at least 2 for a mirrored pool for apps and VMs) while you only need 1 SSD if you use Proxmox as the OS, since you can install everything on the boot drive. Check this video to get a good overview of all the WD drives: But you can also go for Seagate and their IronWolf (Pro) or Exos Range. Unless you go for 10gbps networking, the speed difference in the drives is not going to be really noticable/worth the extra cost for most users. I'm using Intertech rack-mounted server cases. They are big, offer a lot of space and airflow and are ugly as hell and are ment to be mounted into a 19'' rack. 🙂 So yeah, unfortunately I cannot give you any none rack mounted recommendations. 🙂 You can use some PowerLAN adapters in the meantime if needed. 🙂 Yes, the rest can run over wifi, just the server absolutely needs to be connected via cable. Fan noise and HDD noise are a real thing and can be annoying. You don't need to have it good looking but noisy in the living room you can also put it noisy and ugly in the garage or cellar 🙂 Haha, no, my country is a lot smaller, but has the same flag, just with lighter blue and alternate is also available here =D 😉 If you have any more questions don't be afraid to ask them 🙂 Also, once you have your server speced out make sure to post it here as well so that we can take a look to avoid common pitfalls before buying 🙂1 point
-
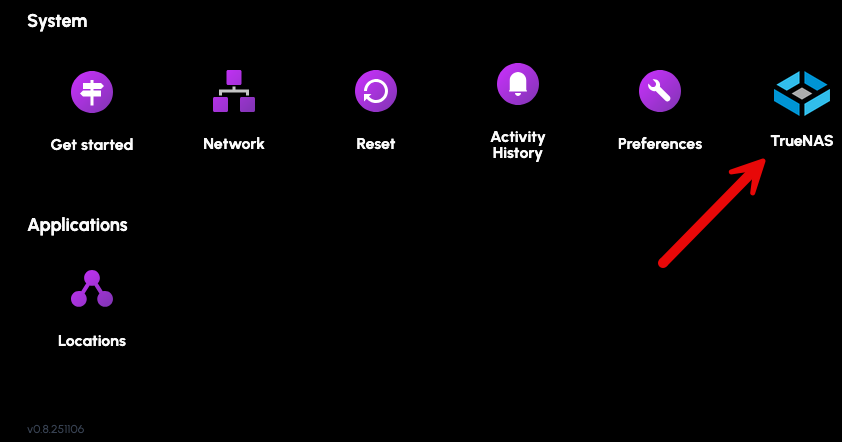
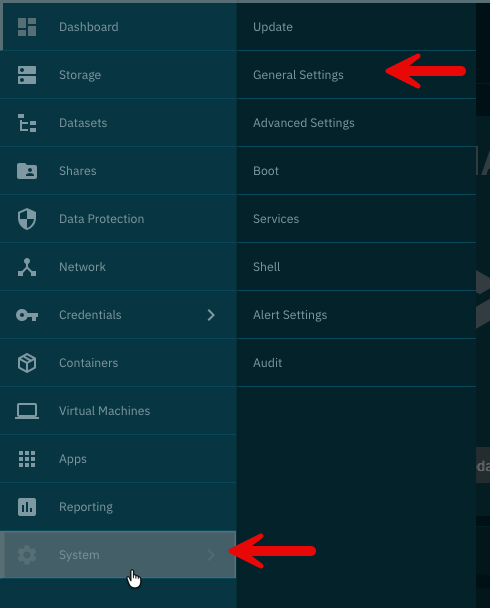
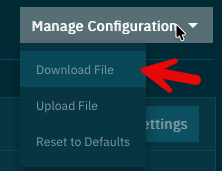
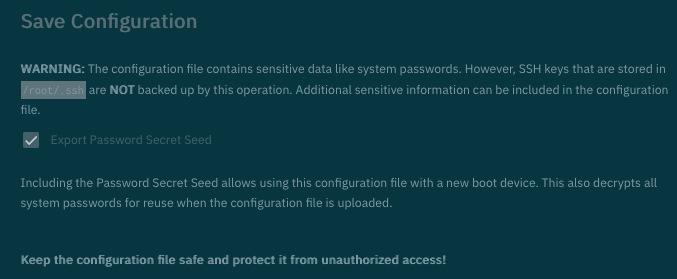
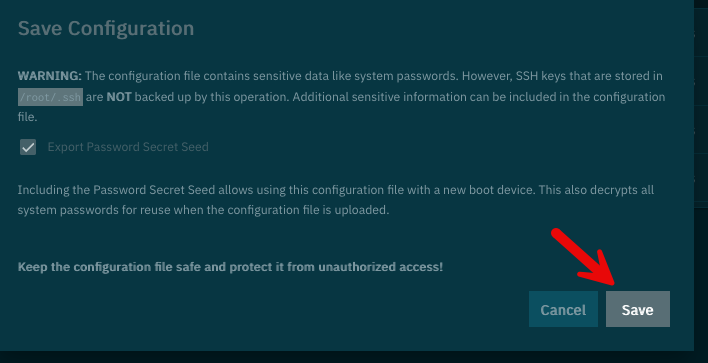
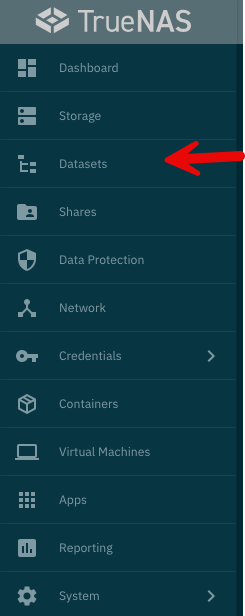
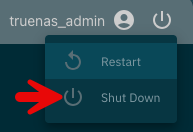
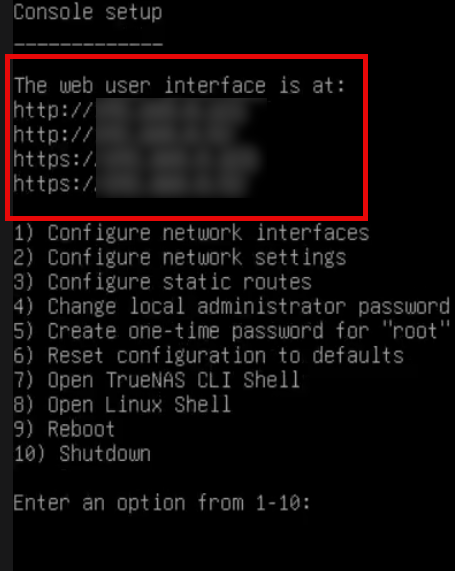
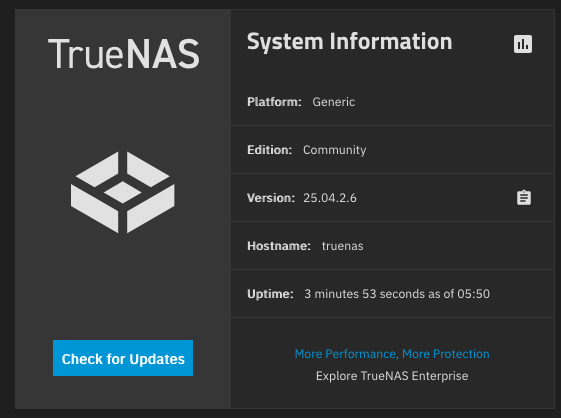
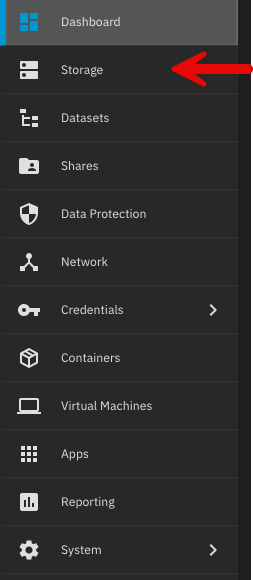
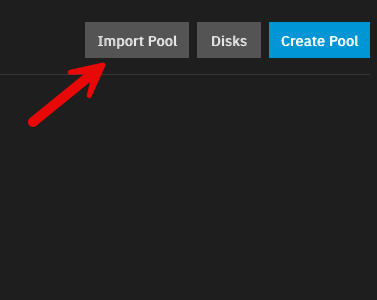
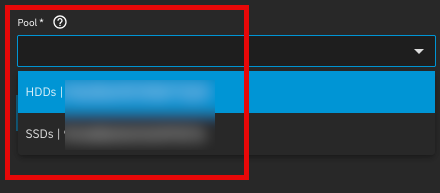
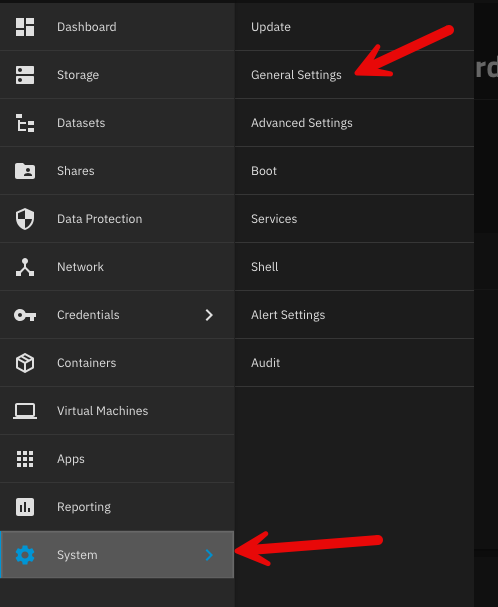
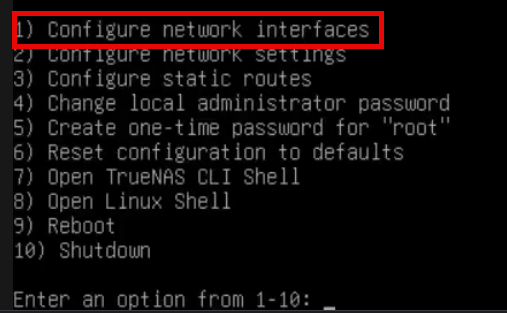
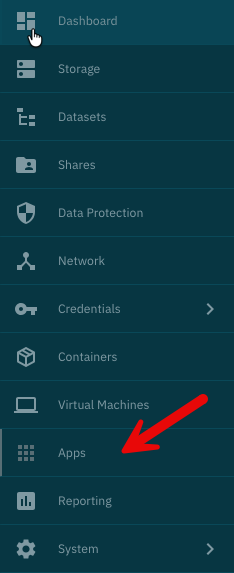
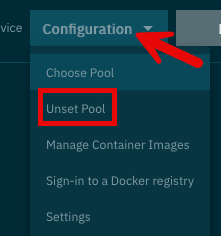
First, a huge thank you to @lnkd for posting the actual steps to do this. All I did was follow everything they said and take pictures, so really all credit goes to them. Original post here: Prepare TrueNAS for reinstall: 1. Login to TrueNAS web interface – go to deck.hexos.com and click Settings: Then click the TrueNAS icon: 2. Once logged into TrueNAS, go to System > General Settings > Manage Configuration > Download File: 3. Read the note presented when you click Download File: 4. Click Save: 5. If you have encrypted datasets, go to Datasets > select the encrypted dataset > Export Key: 6. Now it is time to shutdown the server. In the top right of the TrueNAS web UI click the power icon and click shutdown: 7. Make your changes to the hardware that you would like – for me I added a 10 GB network card to run off fiber. 8. Prepare the HexOS installation drive by following these steps: https://hub.hexos.com/topic/103-illustrated-installation-guide-start-here/ 9. In your router settings, give the new hardware the same IP as your old one, then restart TrueNAS to grab the correct IP. 10. Once rebooted you can confirm on the server the IP address is correct: 11. Login to the TrueNAS web interface with the username and password you set during install (username should be truenas_admin). 12. Confirm your version on the dashboard – if needed, apply the update to the server: a. To confirm what version you need check the filename of the .tar file you downloaded from your configuration. It will have the version number on the end of it. b. Select the same version from the upgrade screen and confirm you want to switch to that upgrade train. c. Apply the pending updates and the system will reboot. 13. Go to Storage > Import Pool > find your zpool: 14. I have two pools so I will import them both. 15. Go into System > General Settings > Manage Configuration > Upload file: 16. The server will reboot after the configuration is applied. Log back into the TrueNAS server once the reboot is finalized. 17. If, like me, you replaced the network cards you will need to login directly to the server and adjust the IP settings: 18. Setup your new interface with the primary IP in CIDR notation, then you can log back into the TrueNAS server. 19. To setup apps, you need to go to Apps > Configuration > Unset Pool: 20. Restart your TrueNAS server then go back into Apps > Configuration > Choose Pool: 21. Once the pool is set you will see your apps again and be able to start them. 22. Navigate to the HexOS Interface (http://deck.hexos.com), unclaim your old server and claim your new one: 23. I ran into an issue where no matter what password I input it would not take it: 24. Currently troubleshooting that to be able to claim my HexOS server in the deck. All of my apps and storage are up and running so I will report back here when I fix this issue.
 1 point
 -
Hey, the local GUI access is currently being rolled out to everyone in accordance to the purchase order and should be available to everyone in the next couple of days.1 point
-
Hello all! We are excited to announce HexOS Local, powering the new local UI/UX for HexOS and capable of so much more. Read more about it on the Blogpost - Introducing HexOS Local1 point