Leaderboard


Popular Content
Showing content with the highest reputation on 01/02/25 in all areas
-
We’ve recently made changes that may affect your current authorized session, and as a result, you may find yourself logged out of the Deck UI. Simply log back in, and you’ll automatically pick up the required changes. If you encounter any issues logging back in, it’s likely due to caching. Please follow the instructions below to clear your cache: For Chrome: Open the browser menu (three dots in the upper right corner) Go to "More tools" > "Clear browsing data" Select "Cookies and site data" and "Cached images and files" and click "Clear data" For Firefox: Open the menu (three lines in the upper right corner) Select "Options" > "Privacy & Security" Scroll to "Cookies and Site Data" and click "Clear Data" For Safari: Go to the "Safari" menu > "Preferences" Click "Privacy" > "Manage Website Data" Remove the cached data for the site For Edge (thanks @thethirdhelix) Click Settings (three dot button near upper-right) > then "Settings" Click "Privacy, search and services" > then "Choose what to clear" (next to Clear browsing data now) Tick "Cookies and other site data" and "Cached images and files" > then "Clear now" For additional instructions or if you're using a different browser, you can find detailed steps at How to Clear Your Browser Cache. If you continue to experience difficulties, please share your experience with us on here on the Hub.3 points
-
Short answer, yes. This was a pretty quick update today and we were expecting 0 downtime. Reality is I think it was only down for minutes before back up. That said, future maintenance windows will be announced in advance to give people time to prepare. This was mostly backend infrastructure and a few small aesthetic things like fonts. Nothing worth writing up in a release notes post. This is NOT the update I've been talking about since December. The team is actively working on a bugfix release and we're hoping to publish it by end of next week.3 points
-
My experience is from datacenter usage. I have over 30 years experience in IT. Mainly supporting IT in the financial sector where IT expenditure is high. My first hard disk was a 20MB model. In my day job I currently consume over 35PB. I have seen it all. Hard cards, Hard Disks, Direct attached storage, 30 rack storage vaults. Take below with a pinch of salt. It's my thoughts only as very little is proven in this field. So much has moved to flash these days. Tiered storage layers are used with most used data being on flash and less used moving to slower layers. I checked with 2 companies we use. (cannot use names here but they are leaders in there fieldsa), generally all spinning hard drives are left with manufacturer defaults and not configured to perform additional or custom spin down operations. There are some outlying use cases where they do this. this such as long term storage vaults where read and write operations are minimal and delays can be planned around in software and OS levels. When we had storage in servers. Generally it was not a good idea to power down or spin down drives. Drives normally store 2 values. Power on cycles and running hours. BOTH are used to gauge wear and tear. It was generally accepted practice to leave it up to the drive manufacturer to set this up in firmware. You would buy the best drive for your situation. Manufacturers such as WD and Seagate have drives for differing uses. Often it's just a firmware change. Other times it can be componentry. All depending on planned usage. A drive setup to spin up and down generally have lower warranties than those set to spin uninterrupted. Perhaps this could also be used as a gauge to what's likely to be better. So for a hard disk. It's a mechanical item. It takes high power to spin up but low power to maintain it spinning. Even a warm 'at temperature' bearing takes less energy to spin than a cold one. But the energy levels are tiny. Some people use a calculation such as 1 hrs spinning = 1 spin up cycle but this has never been proven as far as I'm aware. There are to many other factors to consider. Temperature, even elevation all have an impact. Also. If you have SMART features enabled. this can force a spin up cycle when SMART stats are updated. Even TrueNAS will force a spin up every now and then to check on drives. There is no hard and fast rule. The most important thing is to look at your usage and make a decision. If you are setting up a plex server that will only be used on weekends. then there is an argument that spinning down for 5 days is fine. If your usage is you will be using 10-50 times a day then leave it spinning etc. My Personal Bias I used to focus on running costs at home. All my servers had power meters. I even got into the rabbit hole of how much energy a philips hue light used when turned off. (this is shockingly higher than expected, especially when you have all lights converted to smart lights). I used to have a HP N54L packed with hard disks. It was just a plex server and I was aggressive with spin down cycles. I purchased Seagate 3TB Barracuda drives as at the time they were best £ per TB. They had a 4 Year warranty. I lost 2 of the 4x 3TB Seagate drives within 5 years. Seagate warranty had expired. Was this down to aggressive spin down or the fact I has desktop drives in a NAS? I have no idea. I have now moved to a bigger multi core multi drive for my home servers. I now have NAS grade drives in my NAS and set them to defaults when it comes down to spin down. Yes this may cost me £10-£20 a year more in costs. But I have had no drive failures (yet) and feel happier overall.3 points
-
As you will notice via the orange community announcement here, we are actively undergoing a maintenance window for the Command Deck to stage if for future updates. Some users will find themselves logged out of the deck while others may not. We will update this message once maintenance is complete. Thank you! UPDATE: As of 2:00 PM CST, Maintenance is complete.2 points
-
Any list of changes or fixes we could see?2 points
-
I believe integrating Home Assistant with HexOS could be a game-changer for the operating system, offering functionality that is sorely lacking in almost all other OS platforms today. A Home Assistant integration would allow users to monitor and manage their NAS more effectively. Imagine being able to track critical metrics such as system uptime, array health, disk health checks, and the overall status of your storage systems — all from within Home Assistant. Furthermore, adding control features would significantly enhance the user experience. It would be fantastic if users could automate tasks like rebooting or stopping/starting applications, VMs, or containers directly through Home Assistant. Additionally, automating disk spin-downs during off-peak hours for power savings would be a powerful and eco-friendly feature. The potential of Home Assistant integration is vast, and it's difficult to fully capture all the possibilities in a single topic. However, the core idea is simple: having such an integration, with continuous updates and new features, would be a major advantage for HexOS. While most other operating systems either lack similar functionality or offer only basic, limited capabilities, HexOS could stand out by providing a more comprehensive, user-friendly, and flexible solution.1 point
-
I would like to see first party support for placing any app behind some of the most popular VPNs (PIA, Nord, Express, Proton, Tailscale, etc), as well as custom VPNs (WireGuard, OpenVPN, etc). For example, you may install “The Lounge” IRC client and have all internet communication pass through a PIA VPN so that your home IP is not exposed while chatting. Traditional methods of doing this involve painful configuration of iptables or other firewall rules. I believe this is an area where HexOS could really simplify things: Install a VPN plugin, authenticate with it, and then simply assign an app to a VPN plugin via the app’s settings if desired. It would be fully accessible from the home network without going through the VPN, but all internet traffic would go through the VPN with a kill switch in case the VPN goes down. Thoughts?1 point
-
All of the guides posted here have been posted in the DIrectory of Guides.1 point
-
Thanks @Theo - Really do appreciate your contributions!! Beers are on me next time I see you!1 point
-
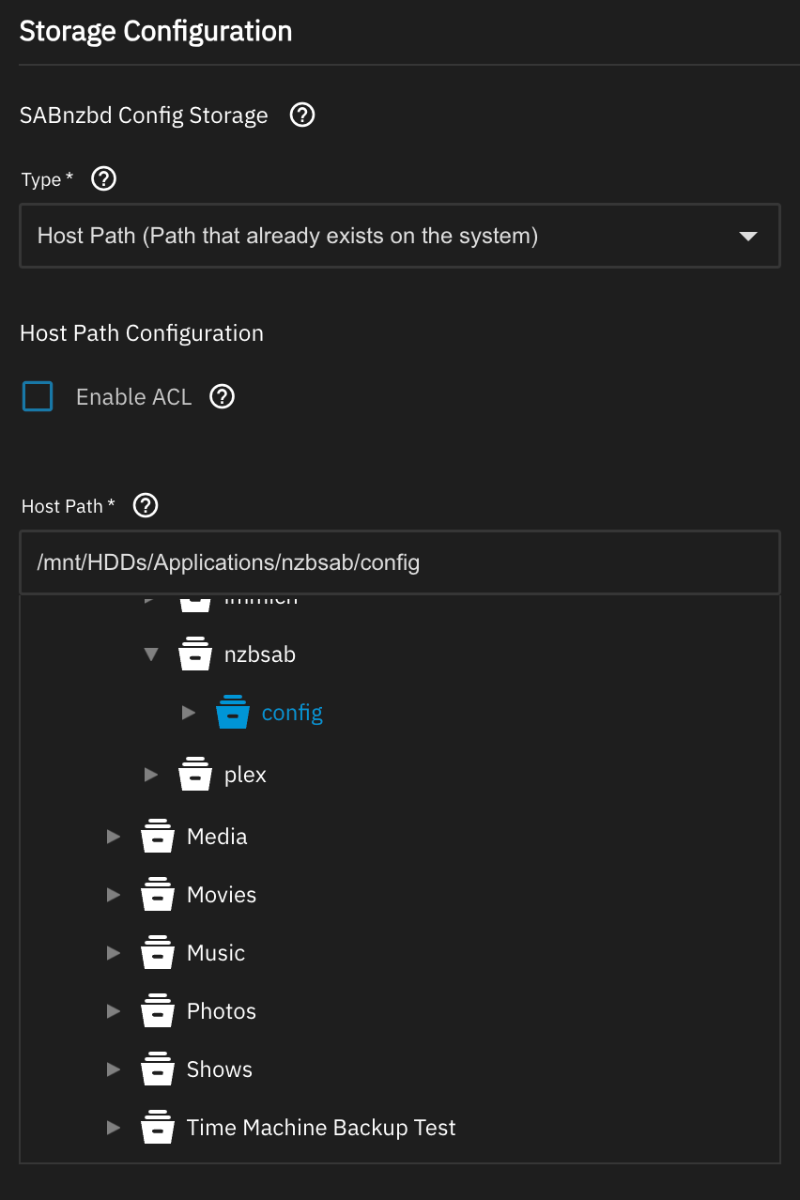
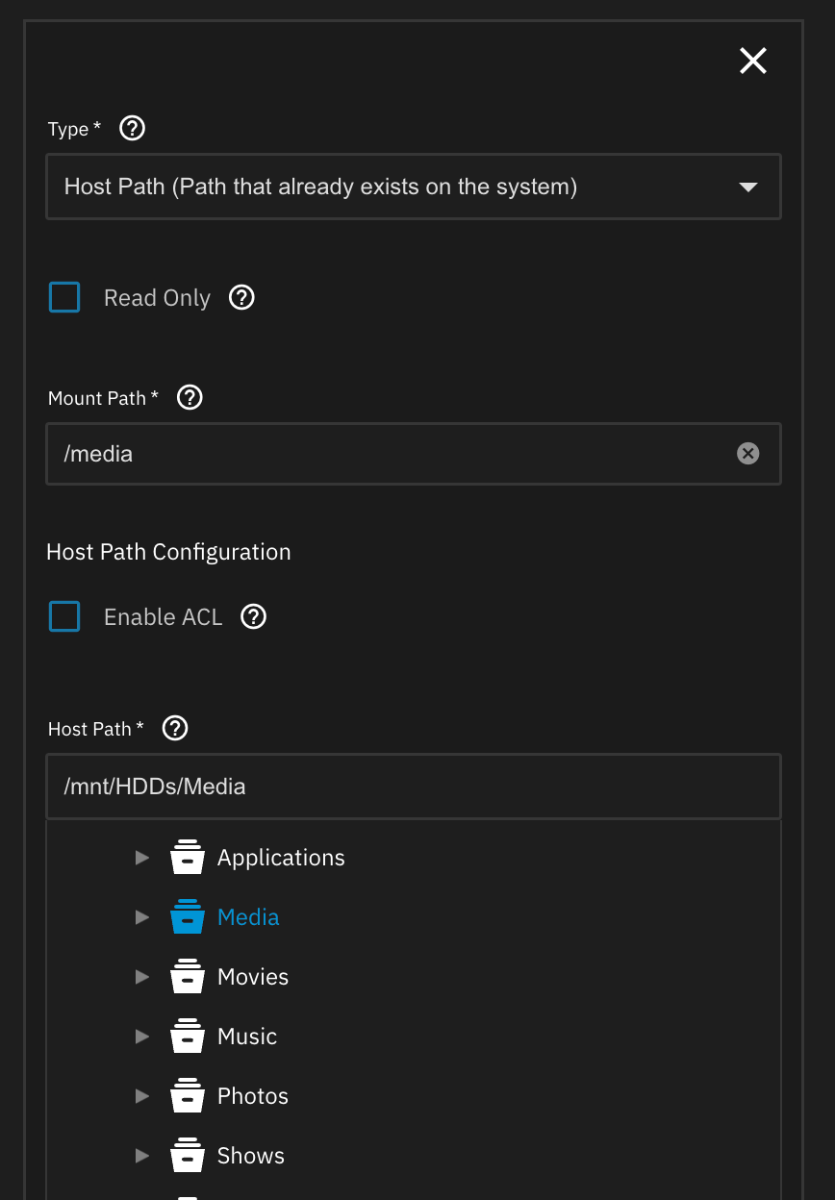
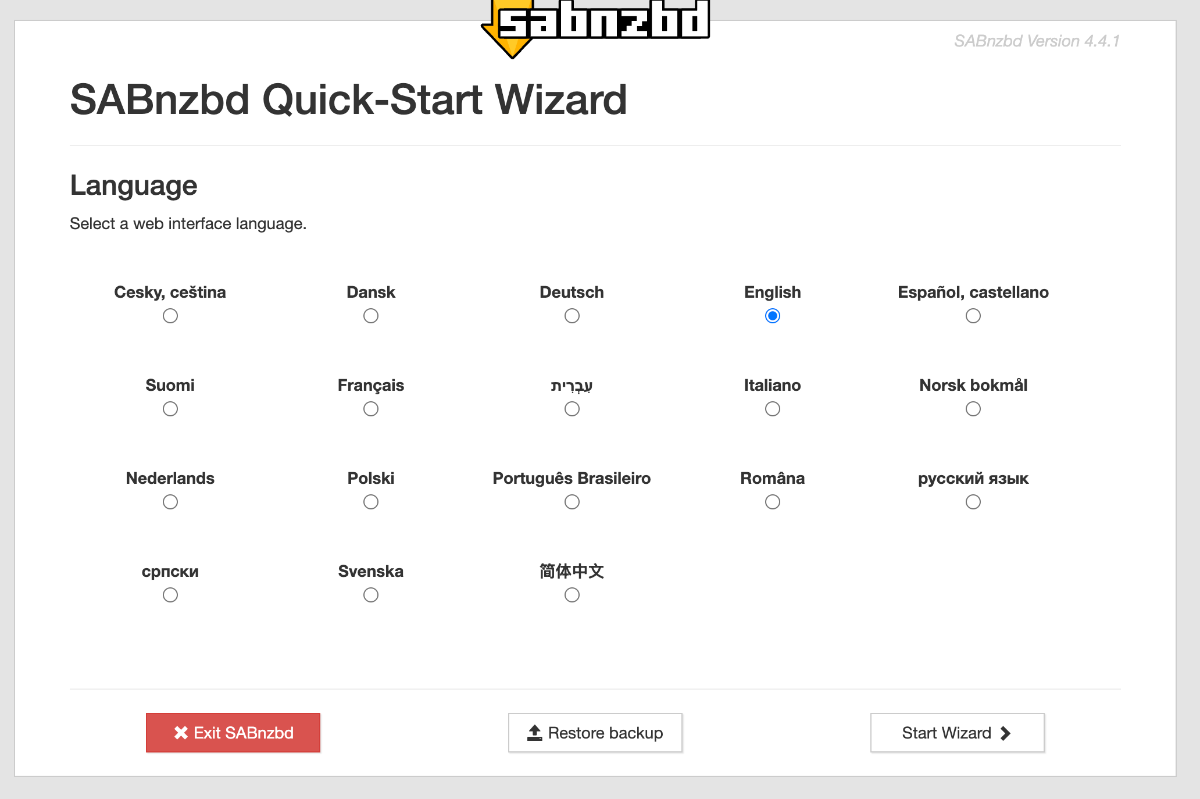
SABnzb guide added now @Dylan & @Mawson
 1 point
 -
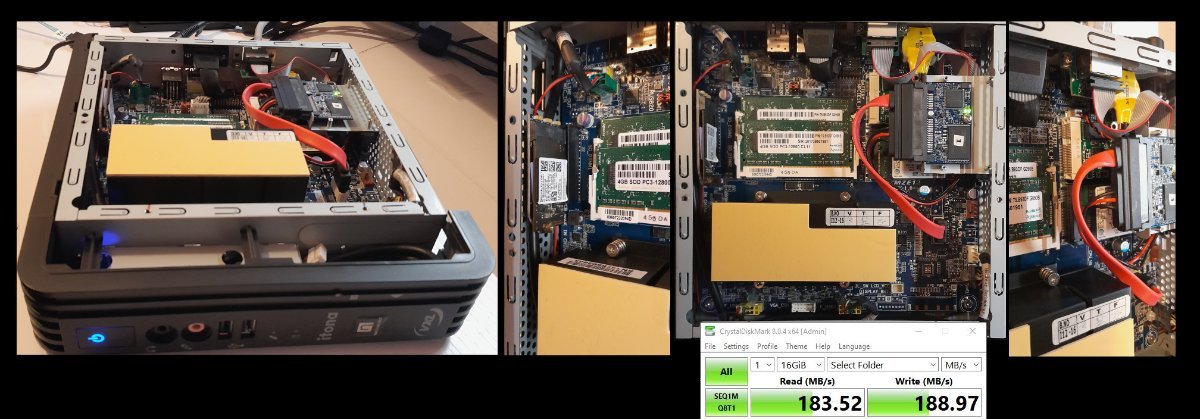
On the bench today I have an old VXL Itona, rocking an AMD A4-5000 (1.5GHz quad core) and 8GB DDR3-1600. Booting from a 32GB SATA SSD Storage pool (for test purposes): 128GB (FGFF) mSATA SSD 128GB M.2 SSD (via PCIe to M.2 adapter board). Optional: 2.5GbE (NGFF) mPCIE card. Power consumption as measured form the outlet: Idle - 11W Load - 24W (Writing @ 1.5Gbps) Network performance was limited to 1.5Gbps by the BIOS being locked down to PCIe Gen1. I appreciate that this is not optimal and could probably be done better, but it was made from spare parts and all fits inside the case...
1 point
-
HA is the number 1 open source project by contributor on github. It naturally should be very high up in my opinion.1 point
-
Concerning question 1: Nowadays, the memory controller is baked into the CPU, so the CPU defines the supported Memory speed and quantity (mainly). In this case it is the 2666 which was mentioned and since everything higher then this is considered overclocking, and a lot of H370 boards don't support overclocking, that's why you are likely limited to this speed. Some Mid- to High End H370 boards support overclocking but I doubt that an OEM board does. Therefore, don't go with faster RAM and take more RAM instead.1 point
-
If it was me I would keep them separated. I mean my dev box and other vms are in a dell r730 and all the storage is being pushed by a i3 8350k. I know the power usage would be more if I loaded the 730 down along side the other vms due to overall heat and processing power used.1 point
-
Heck yeah man. My first setup was done similarly using a Dell and Windows file share.1 point
-
awesome setup 👍1 point
-
Thank you for the info. Your a gentleman and a scholar, and theirs few of us left. -- Matt1 point
-
I legit thought that was some new kind of NIC!!! 😜1 point
-
I've been using a Terramaster D6-320 (USB-C 10Gbps enclosure) with TrueNAS Scale since October and had no issues so far. I'm aware that's not a long time so can't speak for longterm results. Before purchasing I reviewed the points raised there, and whilst they are good general points, I feel most of the potential issues listed can be mitigated for. If you have the space to install a HBA card and connect the drives via that, I feel that is still the preferrer method. In my case I don't have the space for that and had two unpopulated USB4 connections on my host. If you do go for a USB disk enclosure I would recommed going for a higher end one rather then a cheaper one. The one I use passes each disk through as a seperate device and has no built in raid funtionality.1 point
-
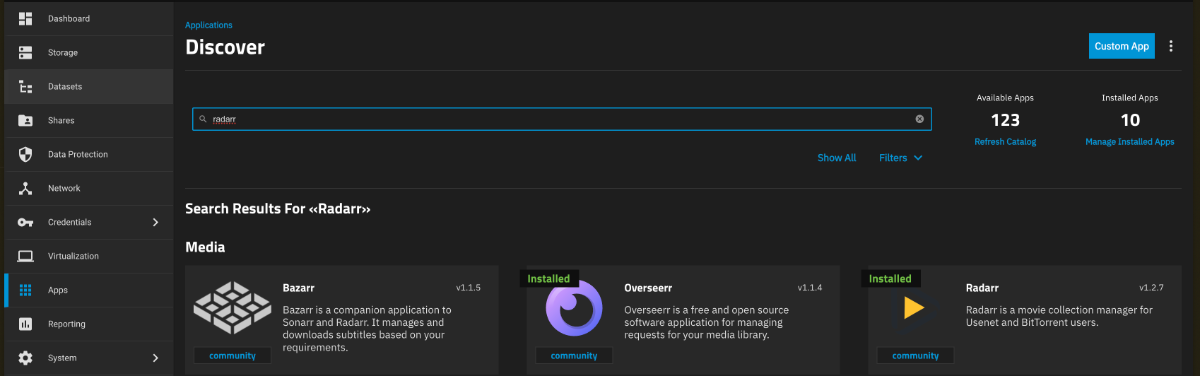
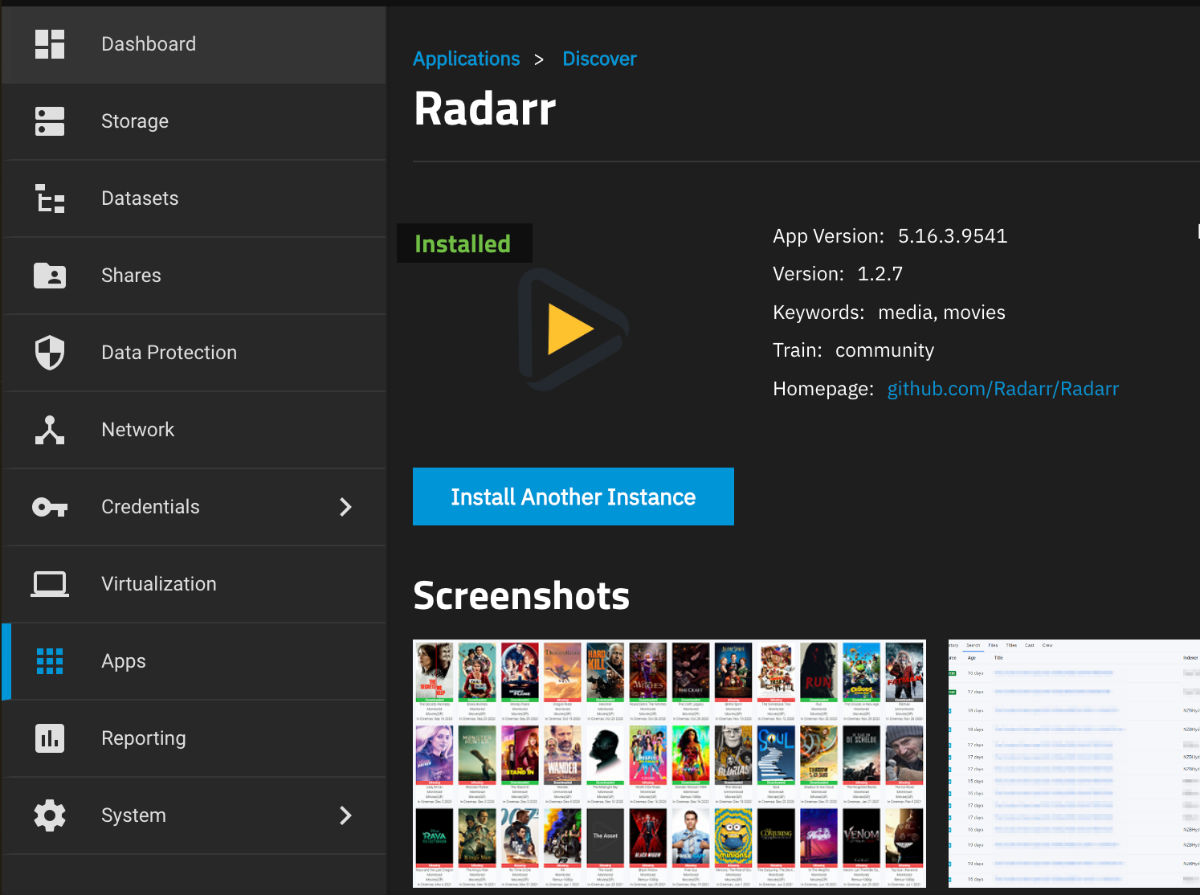
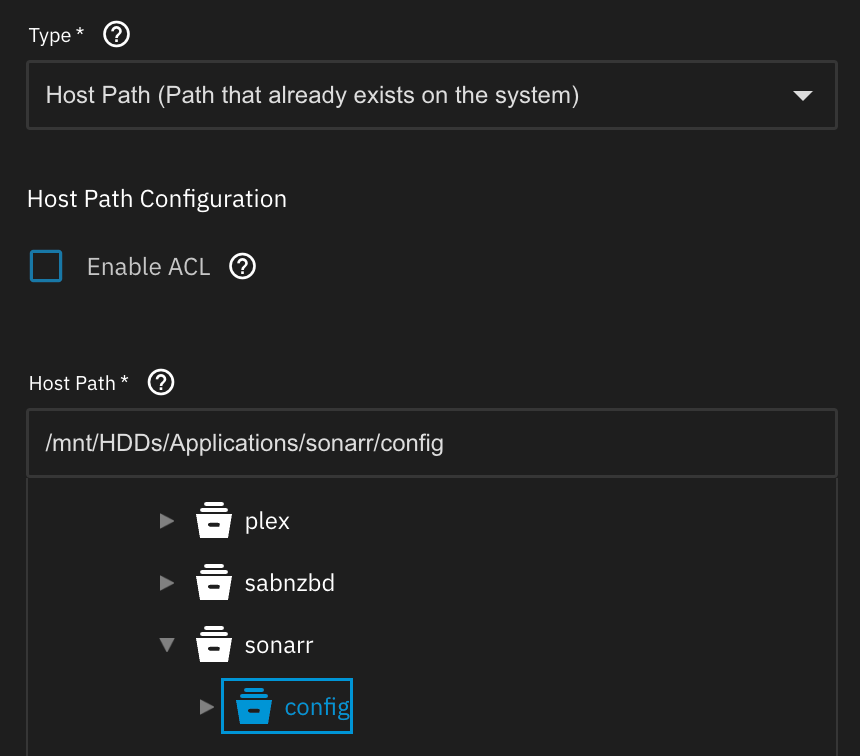
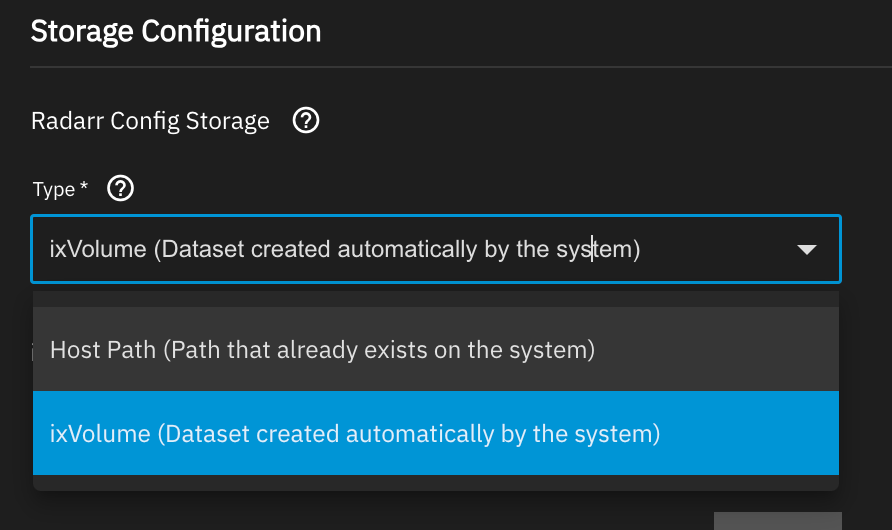
Created a ARR guide, will try to create Prowlarr & SAB NZB one's next. @Mawson one to add the the DIRECTORY OF GUIDES
1 point
-
Also worth mentioning is that during HexOS installation, I noticed you can checkbox multiple drives for installation. I assume this creates a mirror pool of boot drives, thus giving you redundancy. After installation, it looks like you can add a second drive to the boot pool in TrueNAS (which is what I'll have to try, since I did not have an extra nvme when I first installed and I can't be bothered to reinstall at this point unless I really have to).1 point
-
Normally, the boot drive dying isn't an issue (except for the fact that you have to buy a new drive) as long as you have a backup off your settings. You would just reinstall the OS, import the backup and you are good to go. However since Hexos is still in Beta, this is currently not possible, there is no option to skip the pool creation during setup. This will come in the future but it is not there yet. Until then, if your boot drive stops working, your are going to install truenas directly and import the pools (the pool information is stored on the drives, which means you can directly read it from them) this way you can still access your data, however you have lost the Hexos part and can only switch back to Hexos once it supports pool import. Since the data drives using ZFS you have to read them as such, you cannot just mount them individually and try to get data from them. But as I said a boot drive dying will not result in data loss, you would only need to switch to truenas for the time being.1 point
-
Saw your post and I’ll add this to the list for us to curate. Seems like a good one!!1 point
-
Nope it is here forever1 point
-
I think anyone that is willing to drop $300 on an operating system is probably willing to spend $20 on RAM, maybe even less if you salvage old parts.1 point
-
Working great, watching how often I hit that button now. 😇1 point
-
UPDATE: As of 4/17/26, we have updated the ISO installer to run on version 25.10.3 of TrueNAS SCALE. Existing users should NOT reinstall to get this version. You can update from within the Activity card on the Dashboard (or the Notification). Hello and thank you for joining the HexOS beta program! You are an elite and vital part of this project and your participation is greatly appreciated. This post contains all the information you will need to get started with HexOS and how to communicate with our team during your beta experience. Disclaimer Beta Products, Software, and any related Services are still in development, and therefore, you are advised to safeguard important data, to use caution, and not to rely in any way on the correct functioning or performance of the products, software, or any related services. Beta Products and Services are provided to you “AS IS”, without any warranty whatsoever. Expectations During your participation in the beta, we expect you to do the obvious: use and test the software. But we also expect you to communicate with us when things don’t go right or if you’re having trouble. Please post feedback and let us know about your experiences, good and bad. That being said, please remember that this is beta software and early access. HexOS has a long and healthy roadmap ahead. Quickstart Guide For those that just want to get started, here’s the TLDR: Download the ISO here: https://downloads.hexos.com/TrueNAS-SCALE-25.10.3-HexOS.iso or https://hexos-downloads.sfo3.cdn.digitaloceanspaces.com/TrueNAS-SCALE-25.10.3-HexOS.iso (SHA256 Checksum: e551911445c95c1943e6638091896f34d2d423900cccd688ac09d811e78ed450) Use a tool such as Balena Etcher to image a USB flash device with the ISO. Boot your server from the flash device and install the OS to preferably an SSD. When given the option, opt to create the admin password in the installer (do not select the option to "Configure using WebUI"). Remove the flash device and reboot your server when the install is complete. From another device (mobile, tablet, desktop) that is on the same LAN as your server, login to https://deck.hexos.com using your HexOS credentials. Follow the instructions to complete your server configuration. NOTE: As of the 24.10.2.2 build of this ISO, configuring the admin password via the webUI option has been removed from the installer. However, if you select to create an admin password, but then attempt to "cancel" that process, the ISO will proceed with an installation with no admin password set. This is a known bug and the TrueNAS team will be addressing this in a future update to the ISO. Just don't cancel out of creating the admin password in the installer ;-). Hardware Requirements Booting HexOS is designed to support a wide variety of x86 hardware (Intel or AMD). The minimum requirements are a 2-core 64-bit CPU, 8GB of memory, and a 16GB or larger SSD boot device. However, depending on your needs for performance and applications, more resources may be required. Storage Pools Pools are made up of storage devices based on size and type (HDDs vs. SSDs). Storage devices in each pool need to be roughly the same size*. The OS boot device cannot be a part of a pool. Expandable pools require a minimum of 3 devices and can be grown one device at a time. Non-expandable pools can be created with 2 devices. Initial pool width should not exceed 8 devices. Maximum expanded pool width should not exceed 12 devices. At least one storage pool must be created to use HexOS. *In the event of slight variations (e.g. 240GB and 256GB), devices can be grouped, but total capacity for the pool will sacrifice the larger device’s excess storage. Build Recommendations HexOS has been designed so that a relatively modern PC can be easily transformed into a very viable home server. This means using standard HDDs/SSDs and using onboard controllers for storage/networking. However, since we’re based on TrueNAS, our hardware support is actually rather vast. For more detailed hardware recommendations for advanced builds, please refer to the TrueNAS SCALE Hardware Guide. Installing in a VM As HexOS is based on TrueNAS SCALE, it can be installed as a virtual machine as well. While the process should be fairly self-explanatory, please see the TrueNAS SCALE documentation for additional instructions on VM installation. Setup and Configuration Once the OS has been installed and rebooted, you will use a web browser on the same network as your server to register your system and complete the setup process. This can be a PC, tablet, or mobile device. Using a capable browser, login to https://deck.hexos.com. Beta 1 Features Our first release is focused on providing a streamlined user experience for setup and configuration and laying the framework for what’s to come. The main features of Beta 1 include: Setup and configuration wizard Configure your home server in minutes with ease. Analyze system health, with warnings for SMR HDDs. Auto-configure storage pools to safeguard against device failures. Securely manage your server remotely via Command Deck. Storage device management Detect error states and conditions and report through the dashboard Highlight individual storage devices and their respective faults Replace devices from storage pools due to failure or preventative maintenance Expand pools as little as one device at a time Folders and users Create and share folders over your local network. Easily manage permissions for secure access. Apps One-click deploy Immich as a personal photo library app. One-click deploy Plex as a home media server. Automatic folder creation for app storage. Dashboard / UI Access key statistics like CPU, memory, network, and storage usage at a glance. Monitor storage health and see alerts for errors or degraded pools. Manage multiple servers from a single, unified interface. Enjoy mobile-responsive design for effortless navigation on any device.1 point


.thumb.jpg.513d87dfdfd291b48c096a6f0c2fca9c.jpg)