Leaderboard


Popular Content
Showing content with the highest reputation on 12/22/24 in all areas
-
Finally got the Aoostar this week and HexOS installed today. The Aoostar (on the right) will be replacing the 10yo 2x4TB Netgear ReadyNAS (on the left). That thing still does its thang with the ORIGINAL drives! I put 4x8TB drives in the new NAS giving me about 23TB of storage. I won't move anything important over to the new device until at least 1.0 and/or until raid2z is fully supported. Really pleased with the build quality of the Aoostar device. Solid framing, quiet fan and lots of ports.
 3 points
 -
@Mobius, @Theo, @PenguinKing, @Dylan, @jonp I love this idea! Things like this are what make a community great. I agree that a separate sub-forum would be ideal. Possibly 'Support > Guides and Tutorials'. EDIT: All right gents! The wheels are in motion!3 points
-
Plus a running count of the total data capacity on all Hex machines. Forget Linus's Petabyte project, we can call this the (H)Exabyte project haha!2 points
-
I will be having family use my server for backing stuff up and as we all know end users always end up accidently deleting things and then wanting them back. Luckily, TrueNAS has a recycle bin option and hopefully HexOS can add it in one day as a setting that can just be turned on. For anyone who finds this and wants to do it, here are the steps: Set up the folder in the HexOS UI and then in the TrueNAS UI go to: Shares > Click edit on the SMB you want to add the recycle bin too > Purpose = No Presets > Click Advanced Options > Scroll to Other Options > Check Export Recycle Bin Then you will want to set up a job to automatically empty your recycle bin: Navigate to Chron Jobs in the TrueNas UI (just search for it but it's under System > Advanced Settings). Click add then you can either enter this into the command field as ONE LINE or save it to a file find /mnt/HDDs/FOLDER/.recycle/* -atime +30 -delete; find /mnt/HDDs/FOLDER/.recycle/* -depth -type d -empty -delete; If you want to test to see what files will be deleted with this command run it without the "-delete" If you save it to a file (like I did) you will enter this as the command. sh /mnt/HDDs/PATH_TO_FILE/empty_recycle_bin.sh Then just fill out the description, run as truenas_admin, and how often you want it to run and you are good to go. Hope this helps and hopefully it can just be a 1 click type of setup in the future!! P.S. Here is what the commands do: The first command searches for files and directories in /mnt/HDDs/FOLDER/.recycle/ that have not been accessed in the last 30 days and deletes them. The second command searches for empty directories in /mnt/HDDs/FOLDER/.recycle/ and deletes them. Also commands were stolen from here1 point
-
Hey it would be cool to have a straight forward way to install Nextcloud (e.g. the all in one edition https://nextcloud.com/blog/how-to-install-the-nextcloud-all-in-one-on-linux/) on HexOS. I set it up myself on my homelab, but the setup was not as easy and while the software itself works great, I'm not as satisfied with my implementation. It offers a lot of features with a client that is available on a lot of devices already, essentially substituting Cloud storage, Google Calender, Contacts, Office products, Slack (e.g. for small businesses) and as I just saw even LLM like ChatGPT. This would add huge additional value to HexOS, since you easily could substitute a lot of subscriptions that way, while having enormous privacy benefits, a thing the target audience of HexOS would surely profit of. Especially if there is also a way to safely expose it to the internet.1 point
-
Are you going to setup a Official Discord site.1 point
-
You'll notice a new navigation link at the top on the Hub for "Status." We've deployed UptimeRobot to keep track of our online services and the new status page can be found at https://status.hexos.com.1 point
-
Like what Ceph does! That would be super cool but would rely on telemetry that a lot of people might not understand or trust. https://telemetry-public.ceph.com (They're at 1.71 EiB across 3500 reporting clusters 🤯) I do agree though, would be very cool!1 point
-
I told you you this guy ^^^ is a thread ninja! Thank you @Mawson this is logical, relevant and super helpful!1 point
-
Great step Up That one1 point
-
@Dylan Slow and stedy, Im moving alot of stuff from usb 1 &2 devicesn then ill be moving about 12tb from my workstation
1 point
-
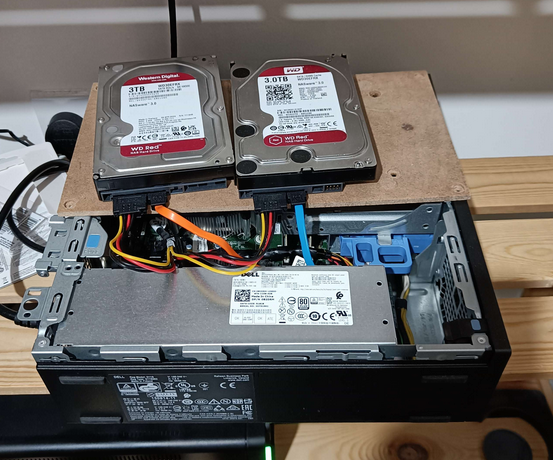
I've been wanting to do this for a long time, but genuinely couldn't figure out how to begin building a NAS. The LTT HexOS video gave me enough confidence to get started though, and I set out to build a system as cheap as I could. I bought the following: Dell Optiplex 3050 Core i5-7500 (3.4GHz), 8GB RAM, no HDD (ebay £73) 16GB Corsair RAM upgrade (Amazon £32) Patriot P300 M.2 PCIe Gen 3 x4 256GB SSD (Amazon £18) 2 x 3TB WD Red drives (Aliexpress £25 each) - performed full burn in test on each before use, no issues at all and of course HexOS for $99 still to buy: PCIe network card (though low priority as onboard is fine for media streaming on home network). Currently looks a mess as the optiplex is SFF and can't fit both drives; a friend is 3d printing a drive enclosure that will mount to the outside of the case. It's virtually silent, and so far been really simple to set up and use, and best of all, I can finally drop my paid for cloud storage 😍
1 point
-
@HappyDace - Welcome to the fold and have a fun! Sounds like you are well on your way!1 point
-
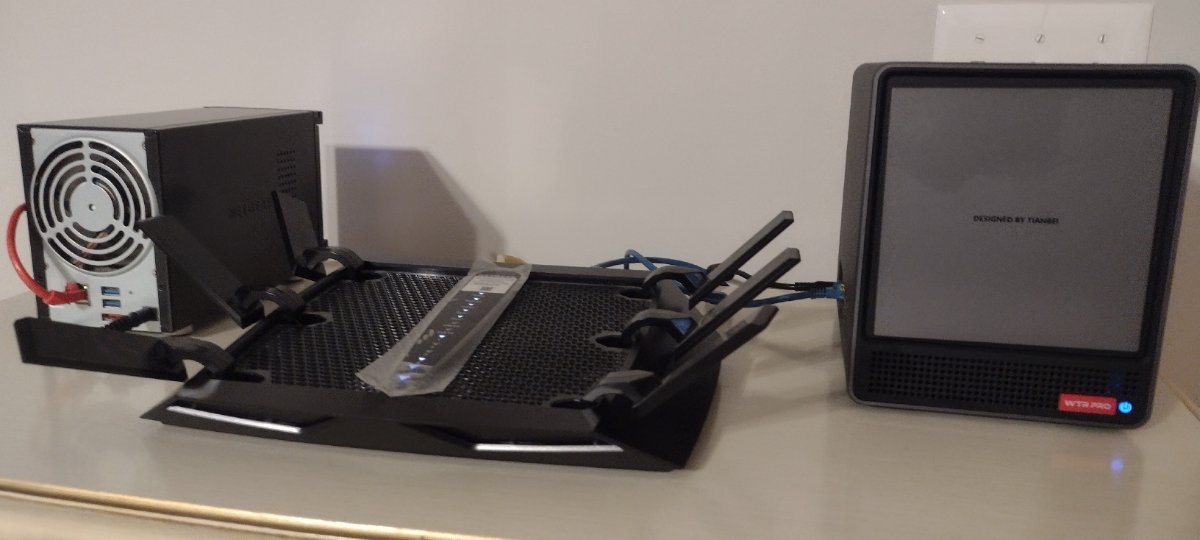
Love the HL15 easy to work in, very well built, that is the 847E16-RJBOD1 below it that is attached to the HL15 as a jbod1 point
-
Great adition. Another Chome tab i have to keep open lol1 point
-
I see what you did there....1 point
-
as a stat guy... yes1 point
-
This image. It spark a primal fear deep within my very being. If there is a god. They have definitely forsaken this image. Sins have been commited that generations will speak of, stories will be told and folklore spread through eons. Of the one who has eyes, but does not see, who has ears but does not hear and has knowledge, but does not know. May there be mercy on those weary souls who stumble upon this sight.1 point
-
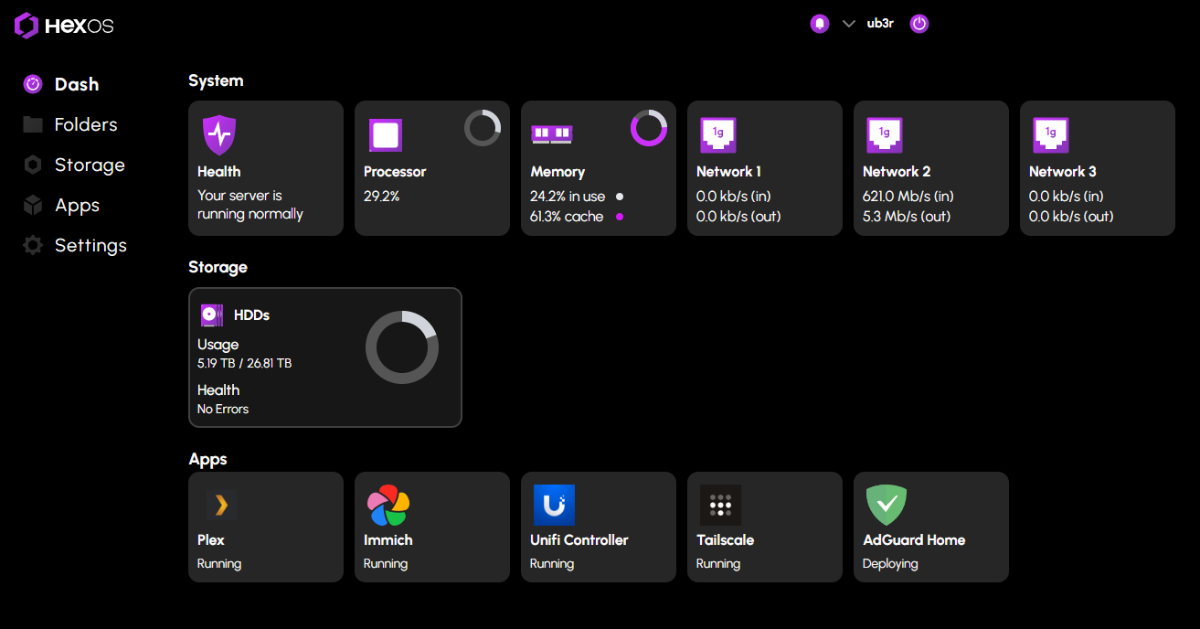
UPDATE: As of 4/17/26, we have updated the ISO installer to run on version 25.10.3 of TrueNAS SCALE. Existing users should NOT reinstall to get this version. You can update from within the Activity card on the Dashboard (or the Notification). Hello and thank you for joining the HexOS beta program! You are an elite and vital part of this project and your participation is greatly appreciated. This post contains all the information you will need to get started with HexOS and how to communicate with our team during your beta experience. Disclaimer Beta Products, Software, and any related Services are still in development, and therefore, you are advised to safeguard important data, to use caution, and not to rely in any way on the correct functioning or performance of the products, software, or any related services. Beta Products and Services are provided to you “AS IS”, without any warranty whatsoever. Expectations During your participation in the beta, we expect you to do the obvious: use and test the software. But we also expect you to communicate with us when things don’t go right or if you’re having trouble. Please post feedback and let us know about your experiences, good and bad. That being said, please remember that this is beta software and early access. HexOS has a long and healthy roadmap ahead. Quickstart Guide For those that just want to get started, here’s the TLDR: Download the ISO here: https://downloads.hexos.com/TrueNAS-SCALE-25.10.3-HexOS.iso or https://hexos-downloads.sfo3.cdn.digitaloceanspaces.com/TrueNAS-SCALE-25.10.3-HexOS.iso (SHA256 Checksum: e551911445c95c1943e6638091896f34d2d423900cccd688ac09d811e78ed450) Use a tool such as Balena Etcher to image a USB flash device with the ISO. Boot your server from the flash device and install the OS to preferably an SSD. When given the option, opt to create the admin password in the installer (do not select the option to "Configure using WebUI"). Remove the flash device and reboot your server when the install is complete. From another device (mobile, tablet, desktop) that is on the same LAN as your server, login to https://deck.hexos.com using your HexOS credentials. Follow the instructions to complete your server configuration. NOTE: As of the 24.10.2.2 build of this ISO, configuring the admin password via the webUI option has been removed from the installer. However, if you select to create an admin password, but then attempt to "cancel" that process, the ISO will proceed with an installation with no admin password set. This is a known bug and the TrueNAS team will be addressing this in a future update to the ISO. Just don't cancel out of creating the admin password in the installer ;-). Hardware Requirements Booting HexOS is designed to support a wide variety of x86 hardware (Intel or AMD). The minimum requirements are a 2-core 64-bit CPU, 8GB of memory, and a 16GB or larger SSD boot device. However, depending on your needs for performance and applications, more resources may be required. Storage Pools Pools are made up of storage devices based on size and type (HDDs vs. SSDs). Storage devices in each pool need to be roughly the same size*. The OS boot device cannot be a part of a pool. Expandable pools require a minimum of 3 devices and can be grown one device at a time. Non-expandable pools can be created with 2 devices. Initial pool width should not exceed 8 devices. Maximum expanded pool width should not exceed 12 devices. At least one storage pool must be created to use HexOS. *In the event of slight variations (e.g. 240GB and 256GB), devices can be grouped, but total capacity for the pool will sacrifice the larger device’s excess storage. Build Recommendations HexOS has been designed so that a relatively modern PC can be easily transformed into a very viable home server. This means using standard HDDs/SSDs and using onboard controllers for storage/networking. However, since we’re based on TrueNAS, our hardware support is actually rather vast. For more detailed hardware recommendations for advanced builds, please refer to the TrueNAS SCALE Hardware Guide. Installing in a VM As HexOS is based on TrueNAS SCALE, it can be installed as a virtual machine as well. While the process should be fairly self-explanatory, please see the TrueNAS SCALE documentation for additional instructions on VM installation. Setup and Configuration Once the OS has been installed and rebooted, you will use a web browser on the same network as your server to register your system and complete the setup process. This can be a PC, tablet, or mobile device. Using a capable browser, login to https://deck.hexos.com. Beta 1 Features Our first release is focused on providing a streamlined user experience for setup and configuration and laying the framework for what’s to come. The main features of Beta 1 include: Setup and configuration wizard Configure your home server in minutes with ease. Analyze system health, with warnings for SMR HDDs. Auto-configure storage pools to safeguard against device failures. Securely manage your server remotely via Command Deck. Storage device management Detect error states and conditions and report through the dashboard Highlight individual storage devices and their respective faults Replace devices from storage pools due to failure or preventative maintenance Expand pools as little as one device at a time Folders and users Create and share folders over your local network. Easily manage permissions for secure access. Apps One-click deploy Immich as a personal photo library app. One-click deploy Plex as a home media server. Automatic folder creation for app storage. Dashboard / UI Access key statistics like CPU, memory, network, and storage usage at a glance. Monitor storage health and see alerts for errors or degraded pools. Manage multiple servers from a single, unified interface. Enjoy mobile-responsive design for effortless navigation on any device.1 point
-
For detailed installation instructions, please refer to this thread: Illustrated Installation Guide - START HERE! =)1 point
-
Would be COOLER if you also put a counter. Purchases and current machines online1 point
-
NICE! Any chance it could get bumped right so it's the last option? Something about having a search function in the middle of a bunch of menus feels odd to me lol1 point
-
HEY! I figured out how to make search more accessible! It's now a top menu nav item. Should help quite a bit.1 point
-
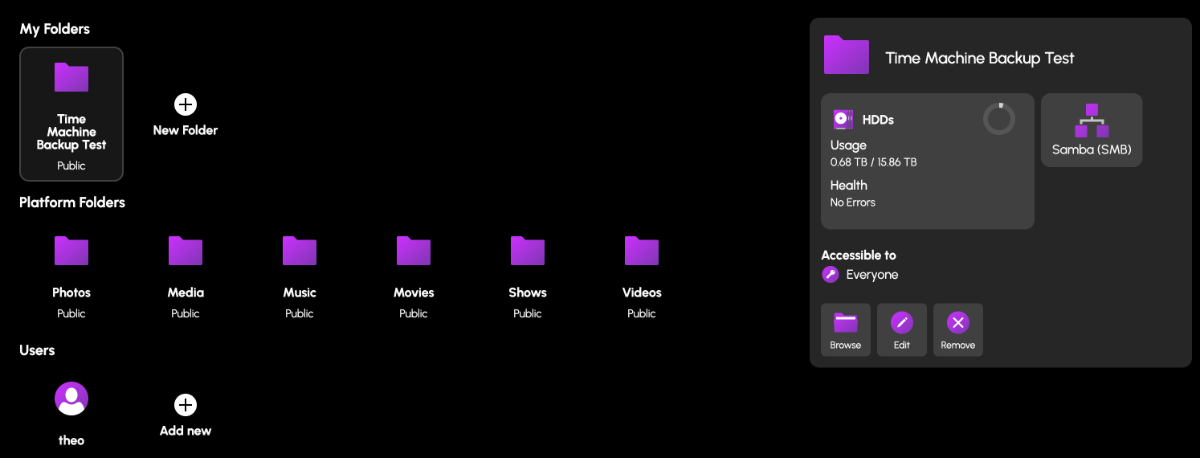
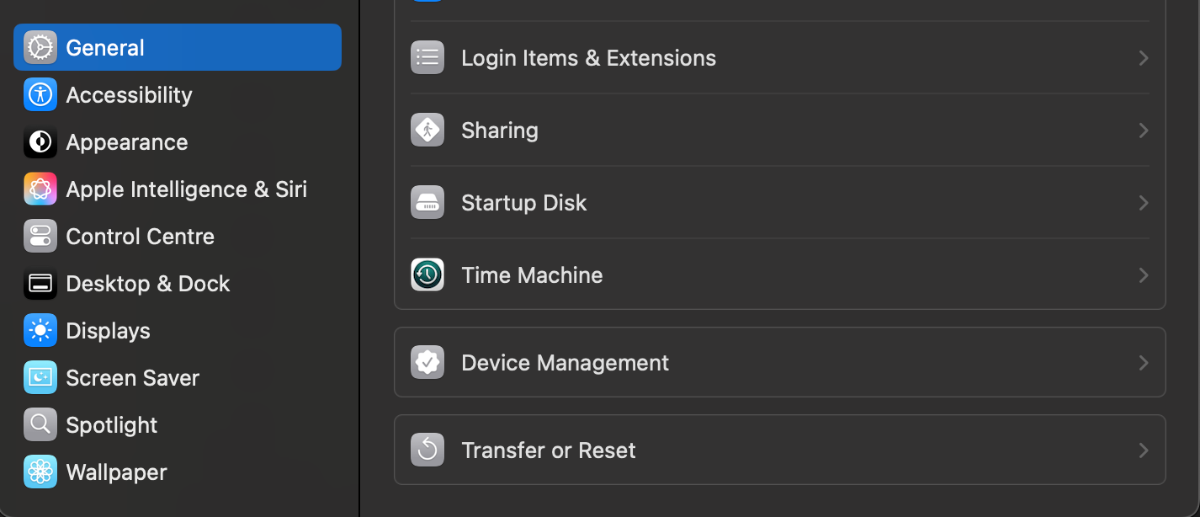
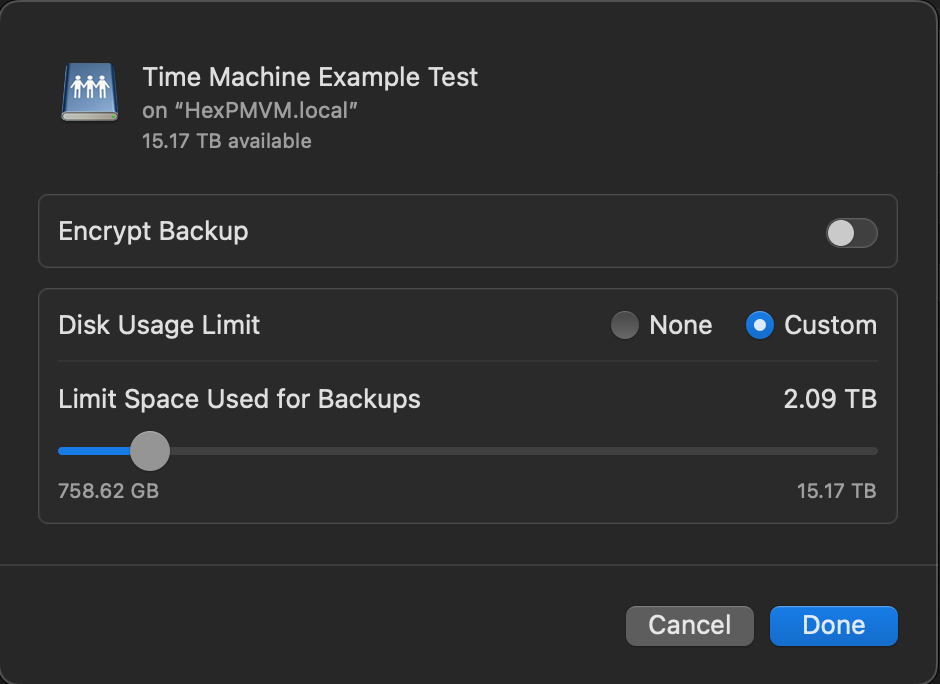
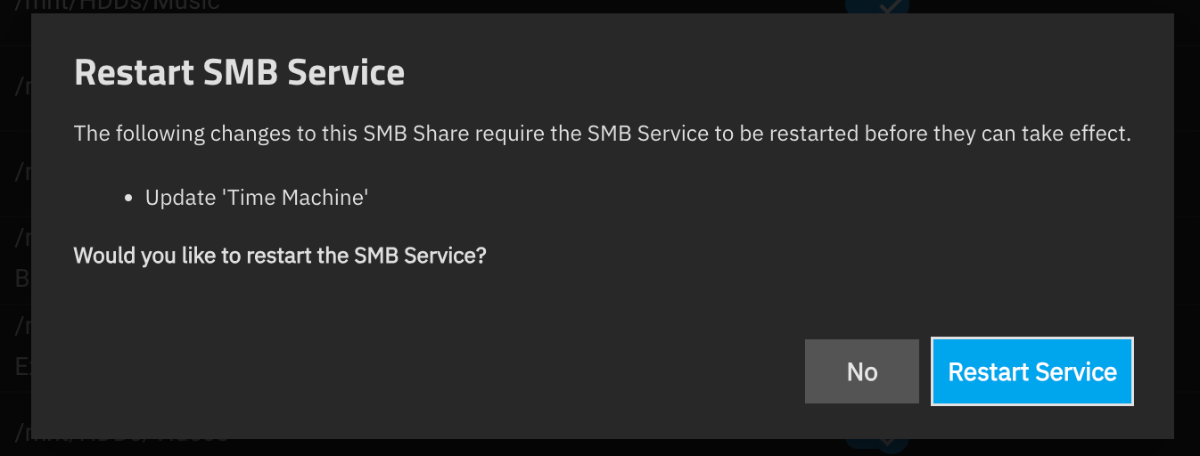
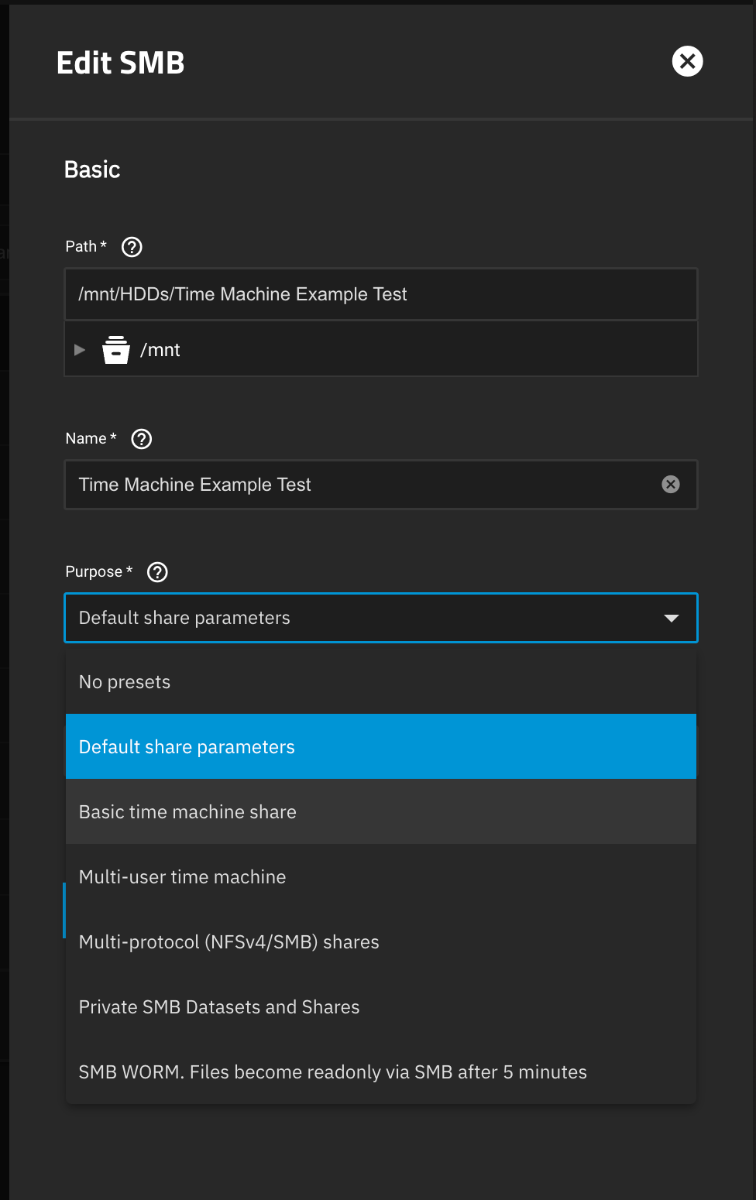
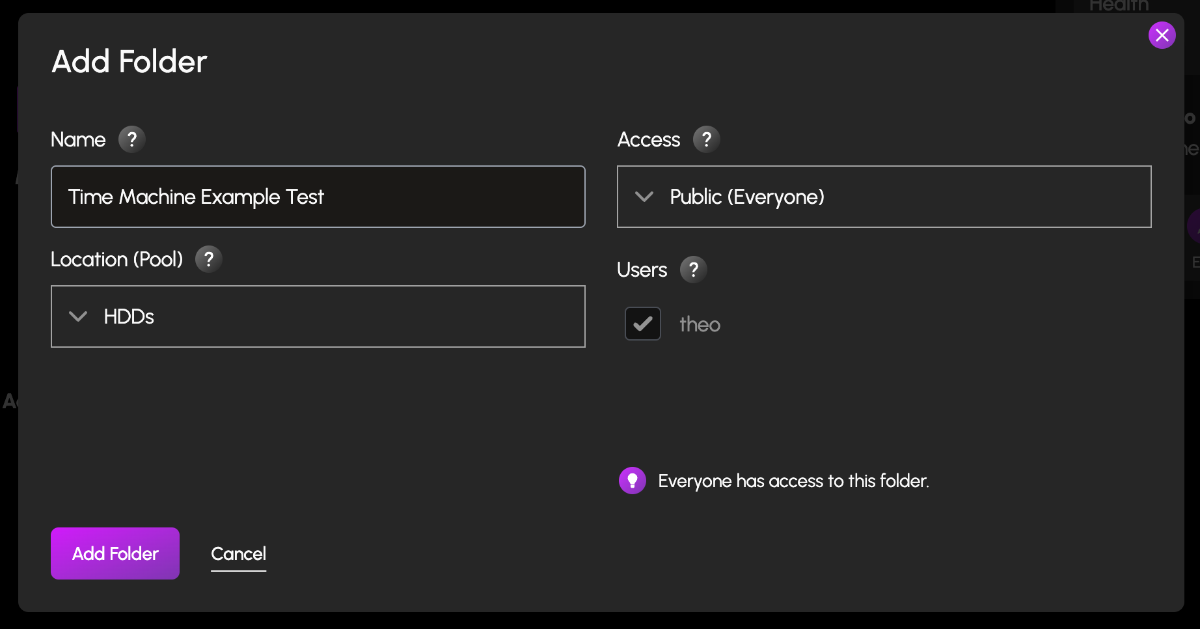
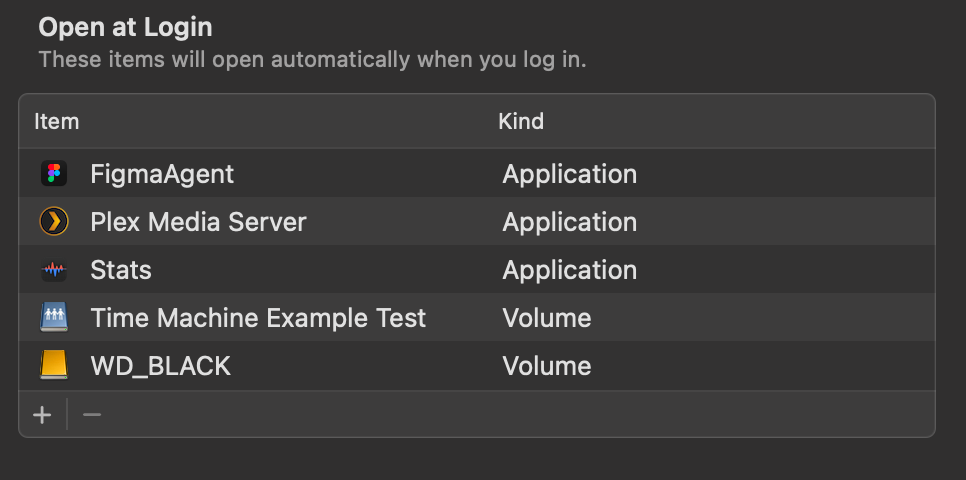
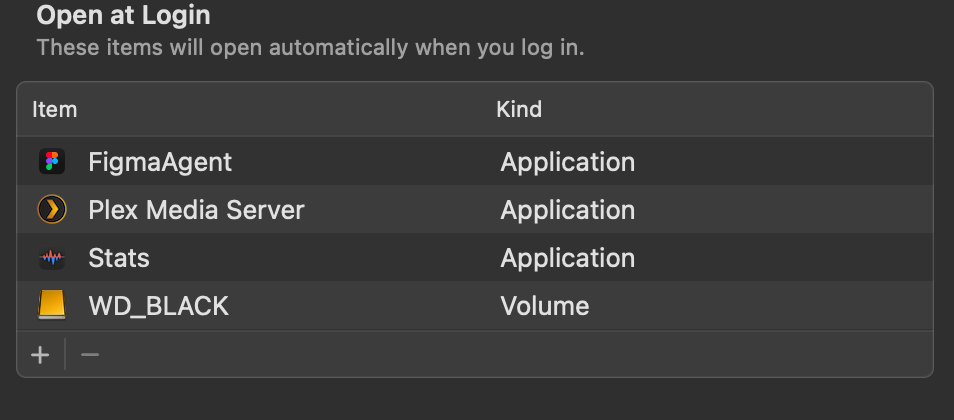
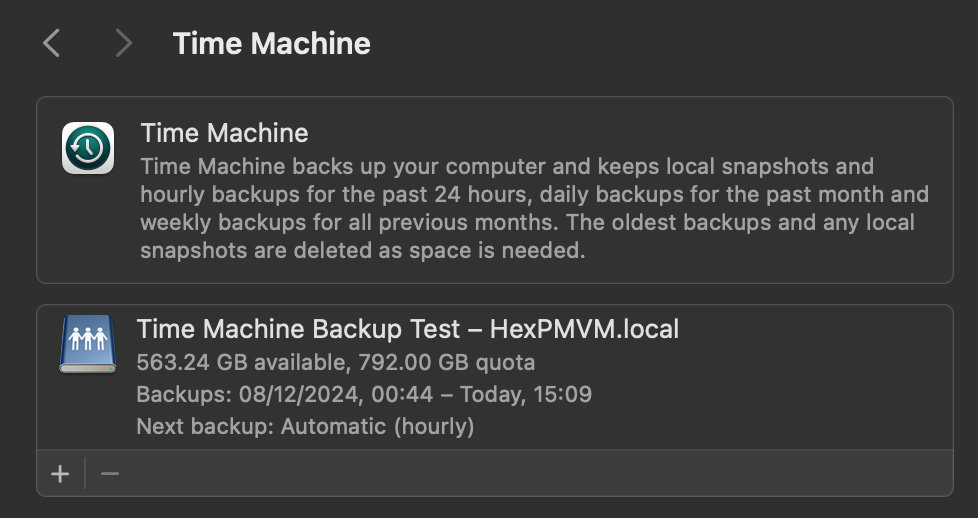
I know this is a request for a more 'One click' Hex TM integration, but incase people wanted to test this now, you can do this in Hex + TN today. (already had mine running a week without issue. TIME MACHINE INSTALL GUIDE Create a Folder & name it time machine (or a custom name) Set the Folder permissions (I left mine open, add user permissions here to restricted access) Navigate to the TrueNas UI (Server IP > Username: truenas_admin Pasword: server password from install) Navigate to the Shares tab, you should see your newly created share. Click on edit (pencil) On the Purpose drop down change to > Basic or multi user time machine. Press save/apply, and it'll prompt a restart of the SMB process. Go to your mac settings > general > Time machine. Click the + icon and locate your time machine share, then click setup disk. FYI if you aren't already connected to your Hex server, you'd need to do so now. Either search for the server in the network tab of finder OR connect to the server with finder > go > connect to server > SMB://[THE IP OF YOUR HEX SERVER] You can now choose to encrypt your backup with a password + if you choose, restrict the total disk usage the backup will have. You should now see your time machine backup setup. This will start automatically, but you can create a back up straight away if you choose. AUTO CONNECT SHARED DRIVE SETUP Now that could be it, but to ensure your Time machine backup will always occur, you need to ensure your Mac is always connected to your Hex server. to do this, we need to add the share to the login items Open Settings > general > Login items > click the + icon Locate your connected time machine share, then click open. You should now see the drive in the login items. That's it, you should be all setup and running.
1 point
-
I like where @Theo's heads at here. @Mawson is a ninja in thread management and might have some good insights as well. I think if we could use the forums approach to test, validate and refine the tutorials, that would help ensure a polished product if they were able to be added to the UI. Just a thought.1 point
-
I would agree with this. Nextcloud install being integrated would be a extremely helpful addition. I hope its on the roadmap sooner rather than later...1 point
-
Let's hope! It's really nice to be able to get support via Discord servers :)1 point


.thumb.jpg.513d87dfdfd291b48c096a6f0c2fca9c.jpg)