

ulfn
-
Posts
145 -
Joined
-
Last visited
Content Type
Profiles
Forums
Articles
Store
Everything posted by ulfn
-
As I said yesterday I always planned on using RAID10 for my old NAS build from 2015. My assumption about RAID-Z2 being the ZFS equivalent of RAID10 was corrected by @Sonic ”RAID-Z2 is more or less the equivalent of RAID6”. Now, with my limited knowledge of RAID and/or ZFS I was always fond of the idea of using RAID10. Especially after I sent a question to a Swedish computer magazine years ago, about hard drives for a NAS and talked about my idea of RAID10. ”That’s what I’m using” was the answer I got from the person at the magazine.
-
When I sent a question to ipc.net support (Jessica Fang) earlier, I at the same time talked about the M2.5x4 screw useful for attaching this SSD chip, at the lower right side. I asked if they could possibly include it in the package when shipping this Pocket NAS. I had to order 10 of them for myself, and only really need the one. Kind of unnecessary... Anyway, they asked me to verify it was this screw I talked about. I don't know if this means it really will be included in the future, but as I told Jessica it would be beneficial for future customers. I'm just happy they are considering it.

-
TrueNAS interface was the thing I would need how-to’s for, yes. 😉
-
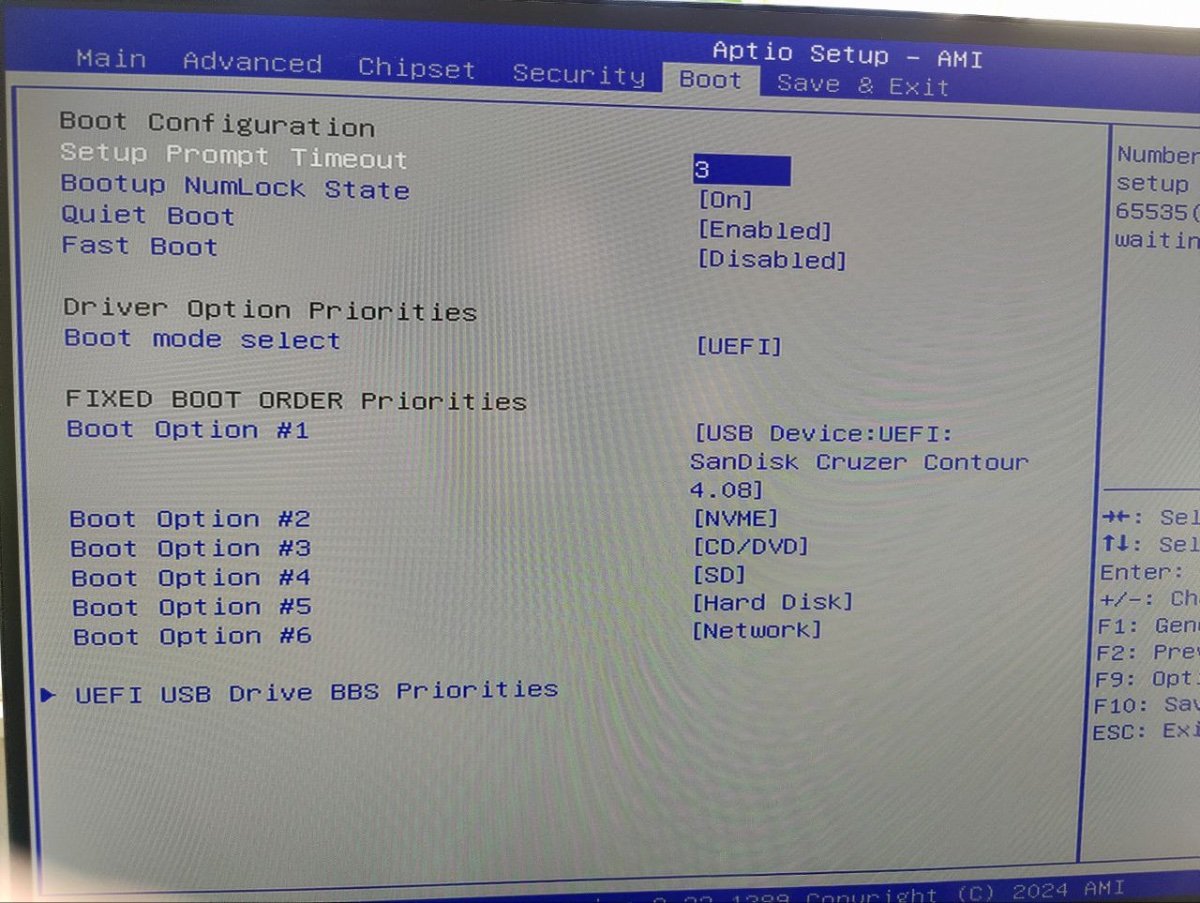
There we go 😀 When I built my old NAS in 2015 I always had RAID10 in mind. As far as I’ve understood ZFS terminology, RAID-Z2 is the equivalent of RAID10. I would like to experiment with that quite soon, even if HexOS itself isn’t ready for it. Think I need to study some How-to’s online before I do, though. Ergo, I pause here, for now.
-
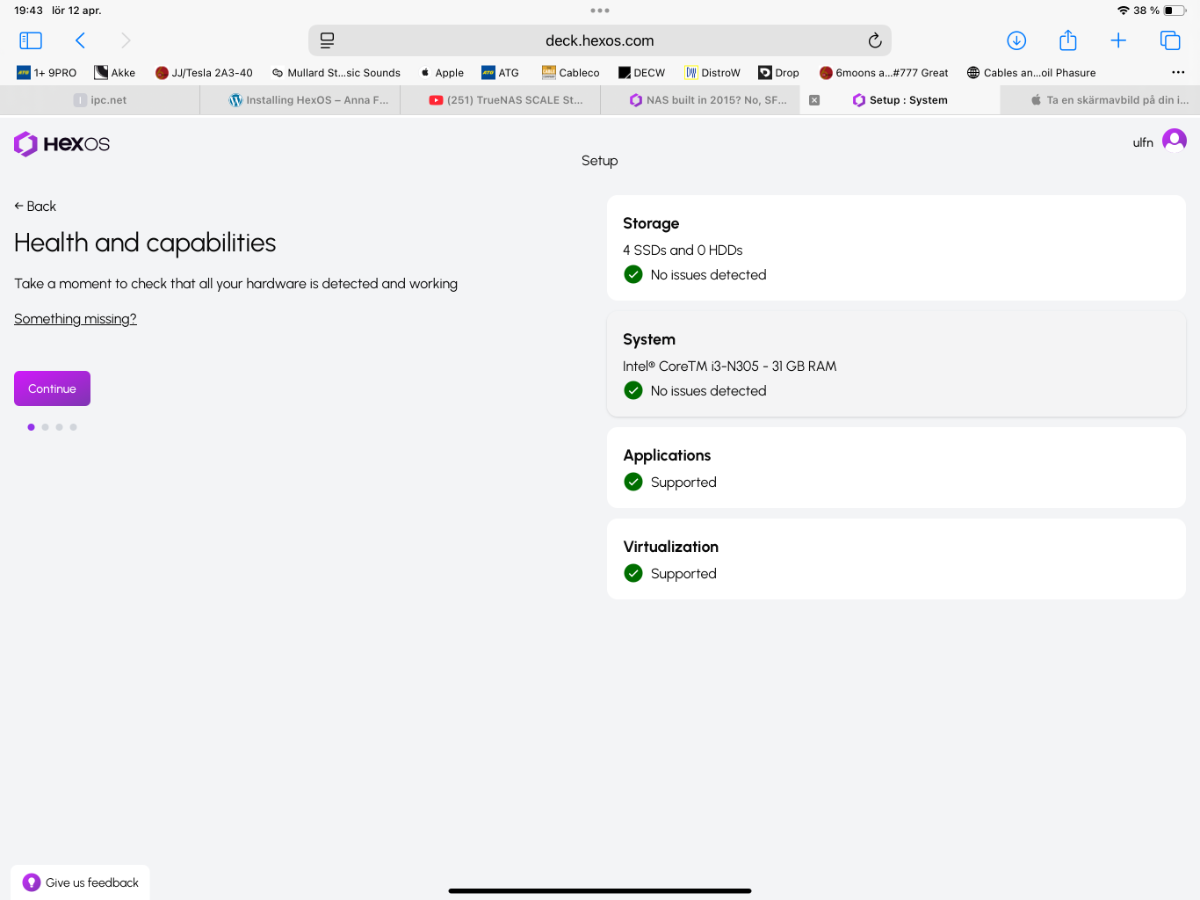
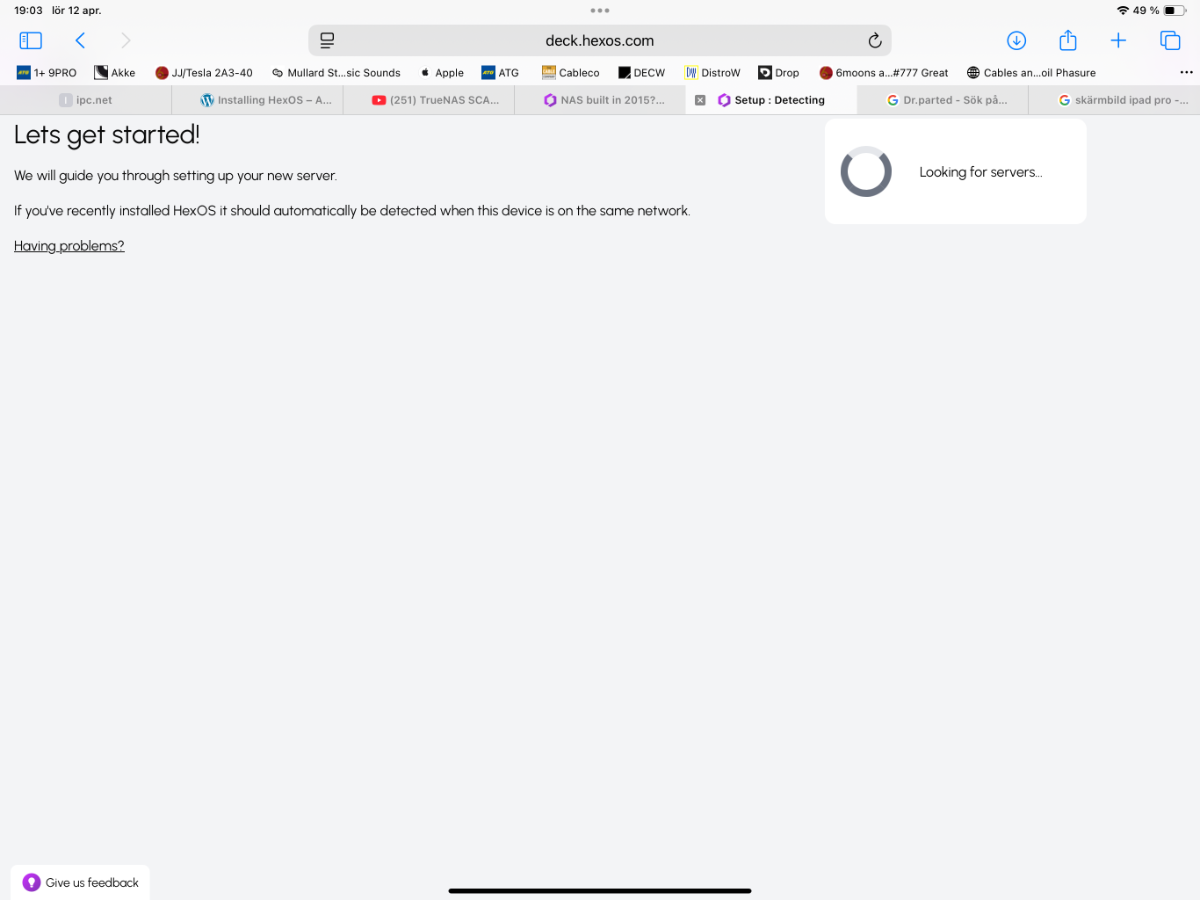
Current events. I’m not really ready to start using HexOS yet, so if this looking for servers takes time, I don’t really mind. I’m on my way, anyway.
-
My chip only SSD is the chosen drive for HexOS.
-
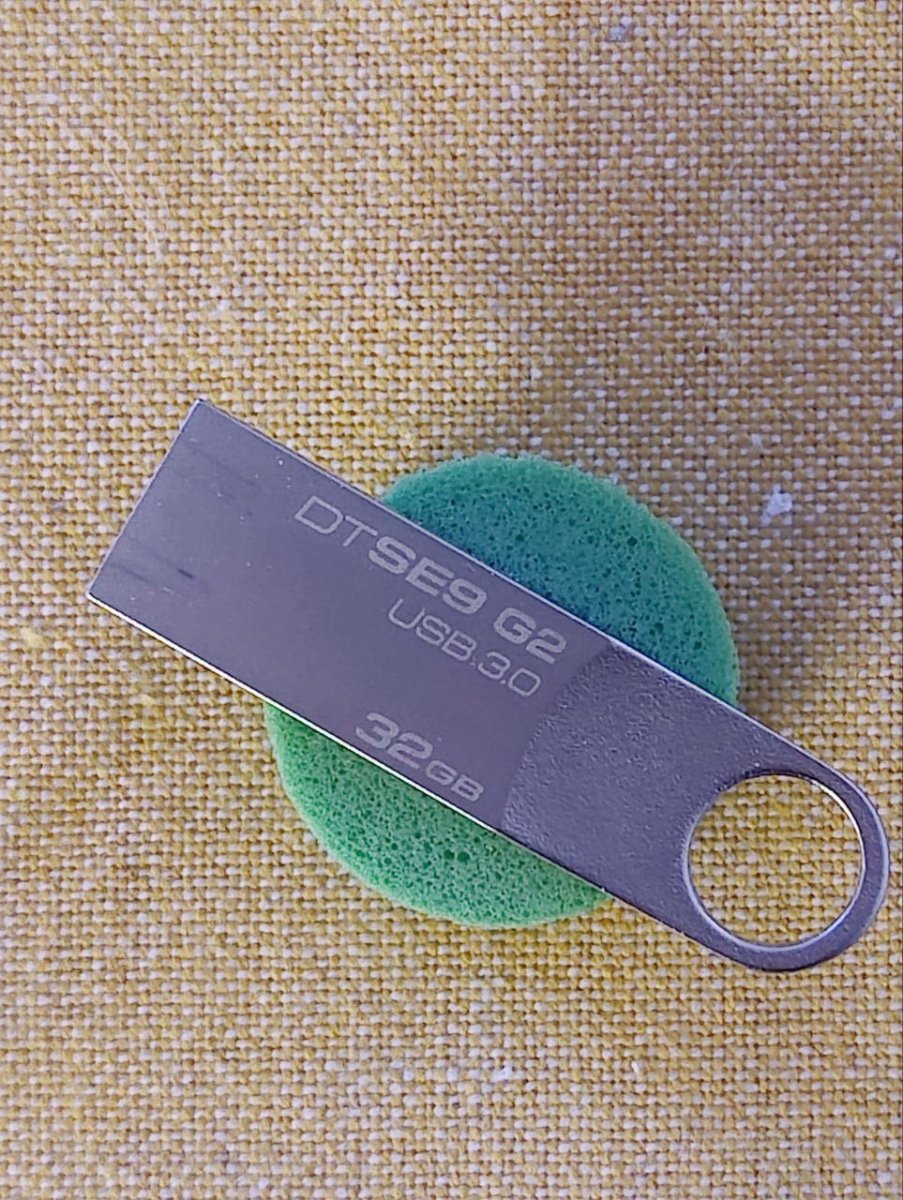
Finally it’s time to care about HexOS itself, not just the HW side of things. Booting from USB is already ok since my recent Dr.Parted Live session, and the key is ready after a meeting with Balena Etcher.
-
Sorry, the early morning hour isn’t helpful for writing posts. What I meant to say was I paid for shipping only. Over and out for now.
-
So, when I connected the Pocket NAS for this Dr.Parted live session, I noticed the outer part of the power button was missing. I had a little plastic ”thingy” I could use to get it going anyway. After I was done with this I contacted Jessica Fang at ipc.net support about my problem. We agreed about them sending me a replacement, and an extra spare one, and that I pay for shipping. That’s only fair I think. I couldn’t honestly say I did nothing to cause this problem, since I never noticed it falling off. The most economical shipping was $6 and that I paid through PayPal.
-
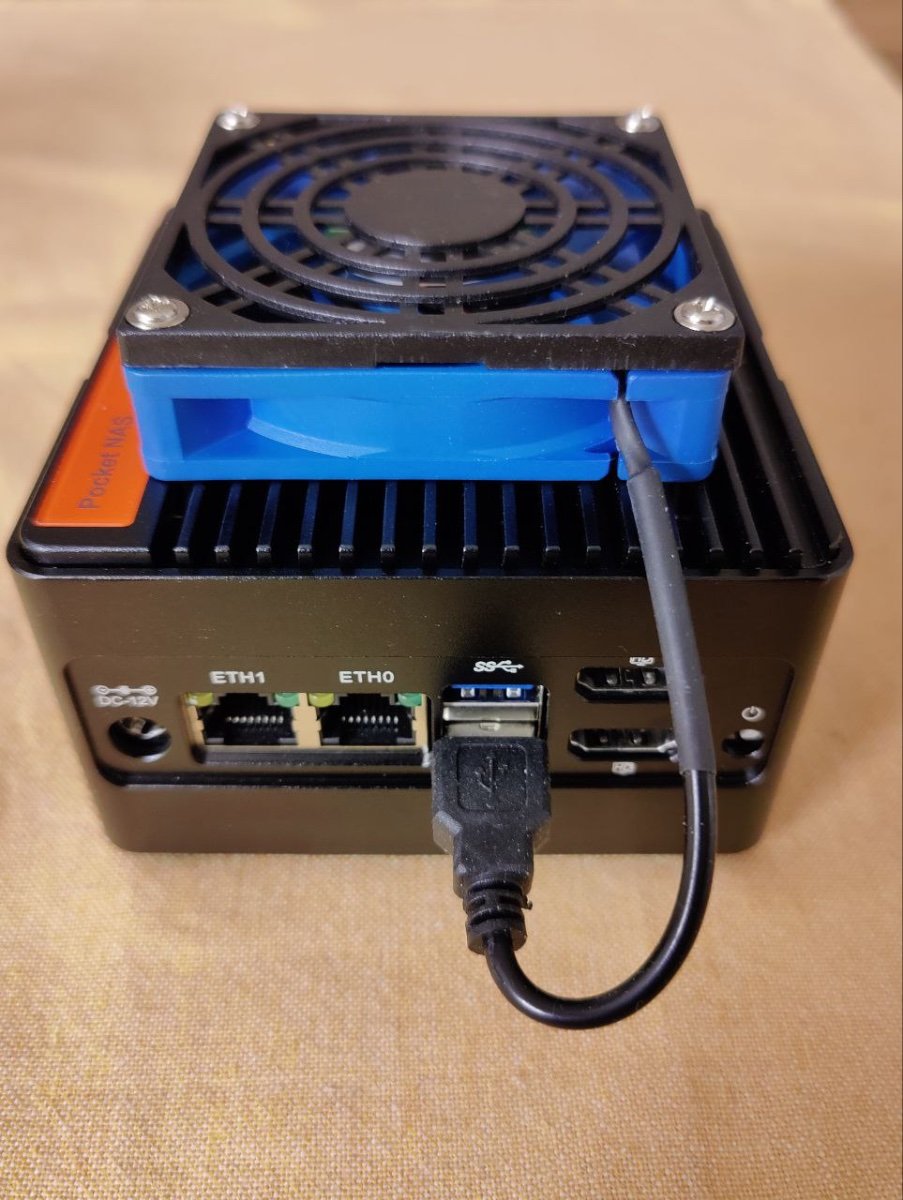
For those who might wonder about the external fan on the Pocket NAS, here’s a picture for you. On the ipc.net site where I got it, they say it’s optional, but I got one with my delivery. I don’t know if that was a temporary offer, though. I intend to begin with no external fan attached, relying on the internal fan for temperature control. Only if necessary I would use the extra fan, For a cleaner look, if nothing else.
-
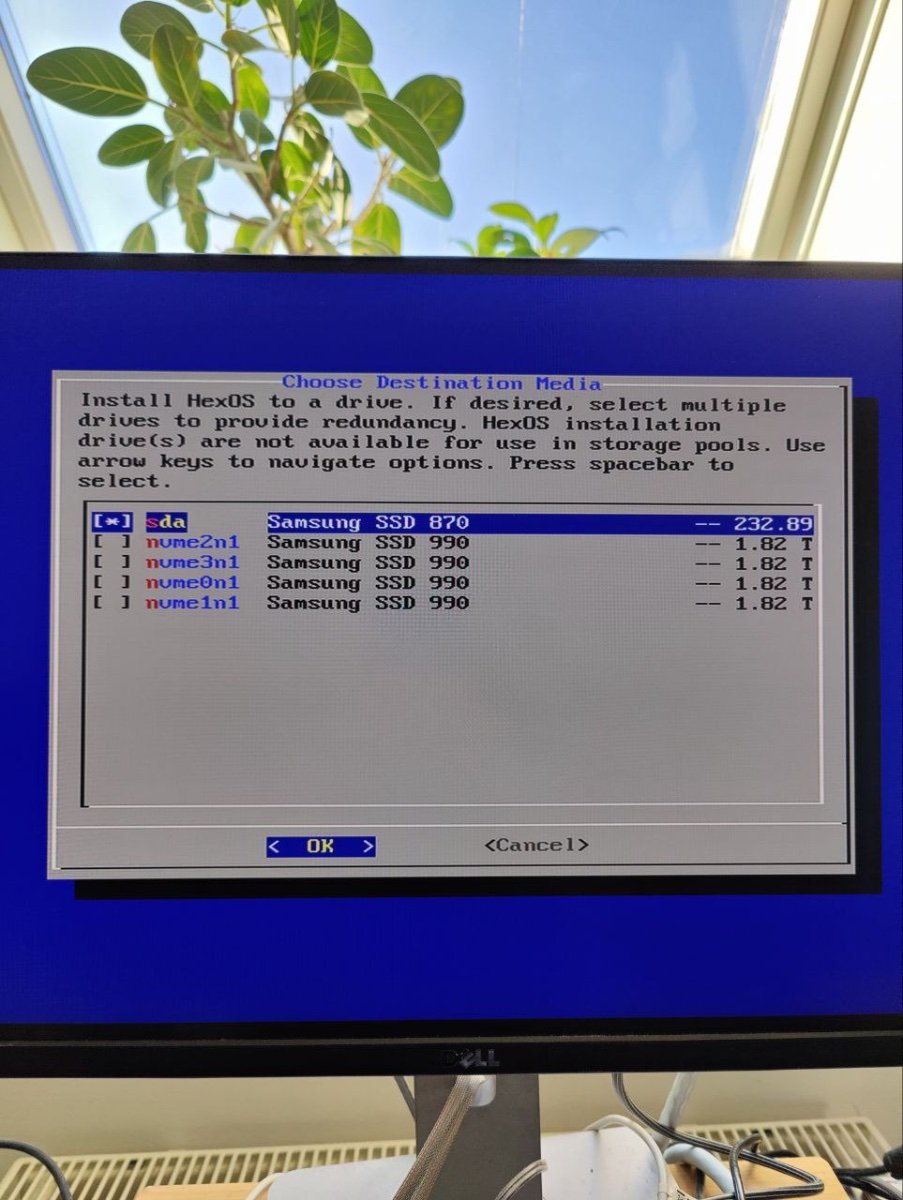
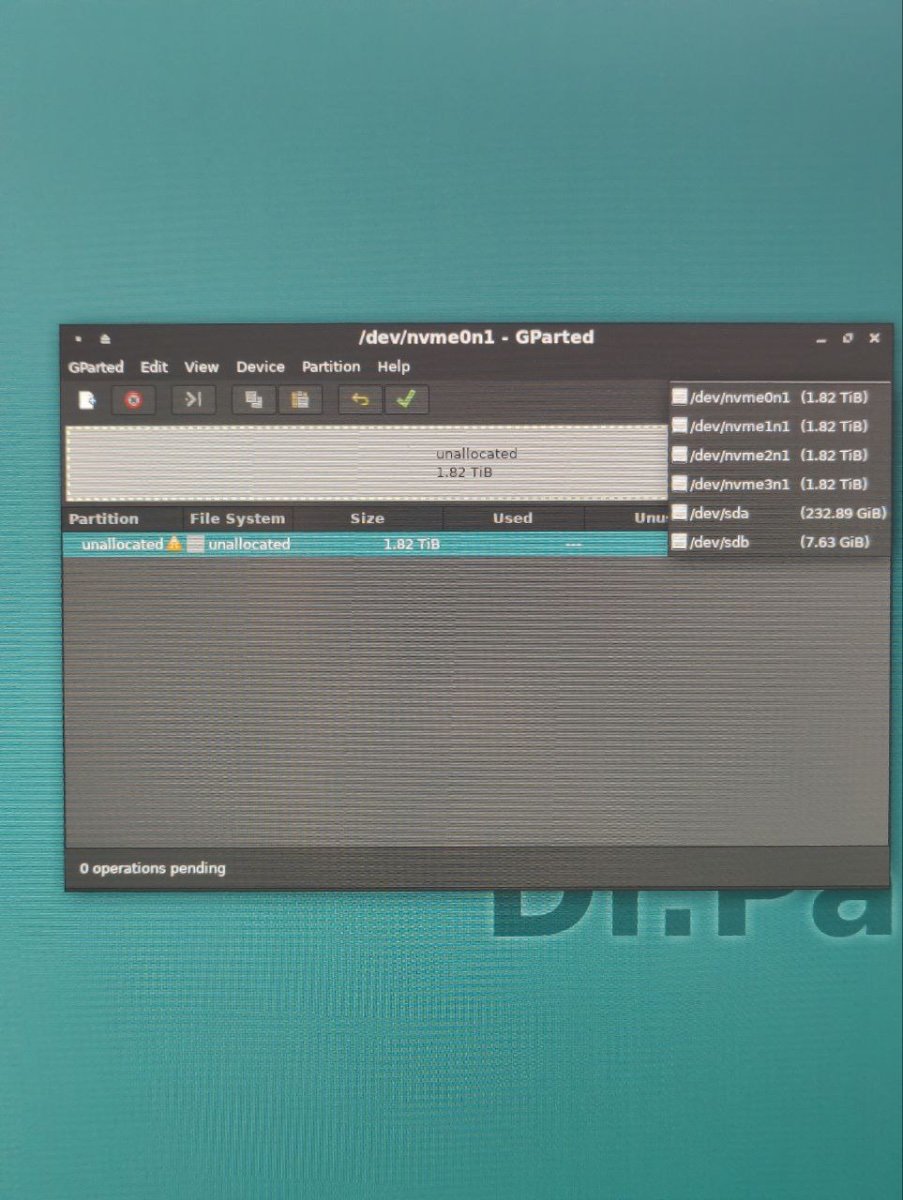
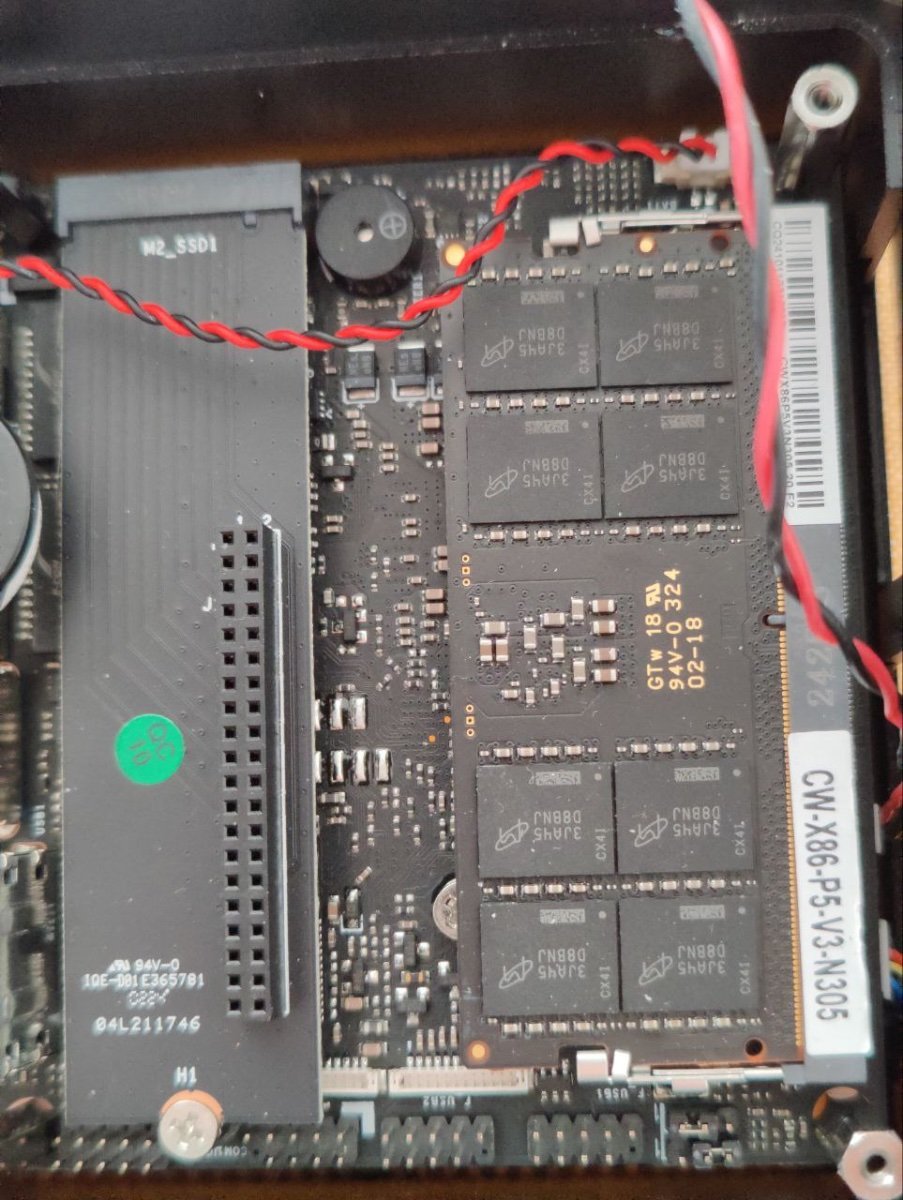
So, reality gave me a moment to verify my drives. A live session of GParted gave this result. All drives are ready for action. My four NVMe drives are there, sda is the SSD chip I installed a couple of days ago, and sdb is the USB stick with GParted. Hooray 😀
-
When this Pocket NAS is ready for duty I intend to put it on four damping feet, to gain some extra height for more air to pass under the aluminium box. This to further help in heat dissipation. And they are so inconspicuous, as to be almost invisible, right 😉 Another reason is, I want to reduce potential vibration noice from the hidden fan inside, if that would rev up. These feet I borrowed from my HiFi nerd side, they are used for like CD-players or other ”boxes”with a weight between 2-5 kg. The green color is specific for this weight. My Pocket NAS is about 1,2 kg, but this would have to do. Now I must take a little break from this project for a couple of days. Over and out.
-
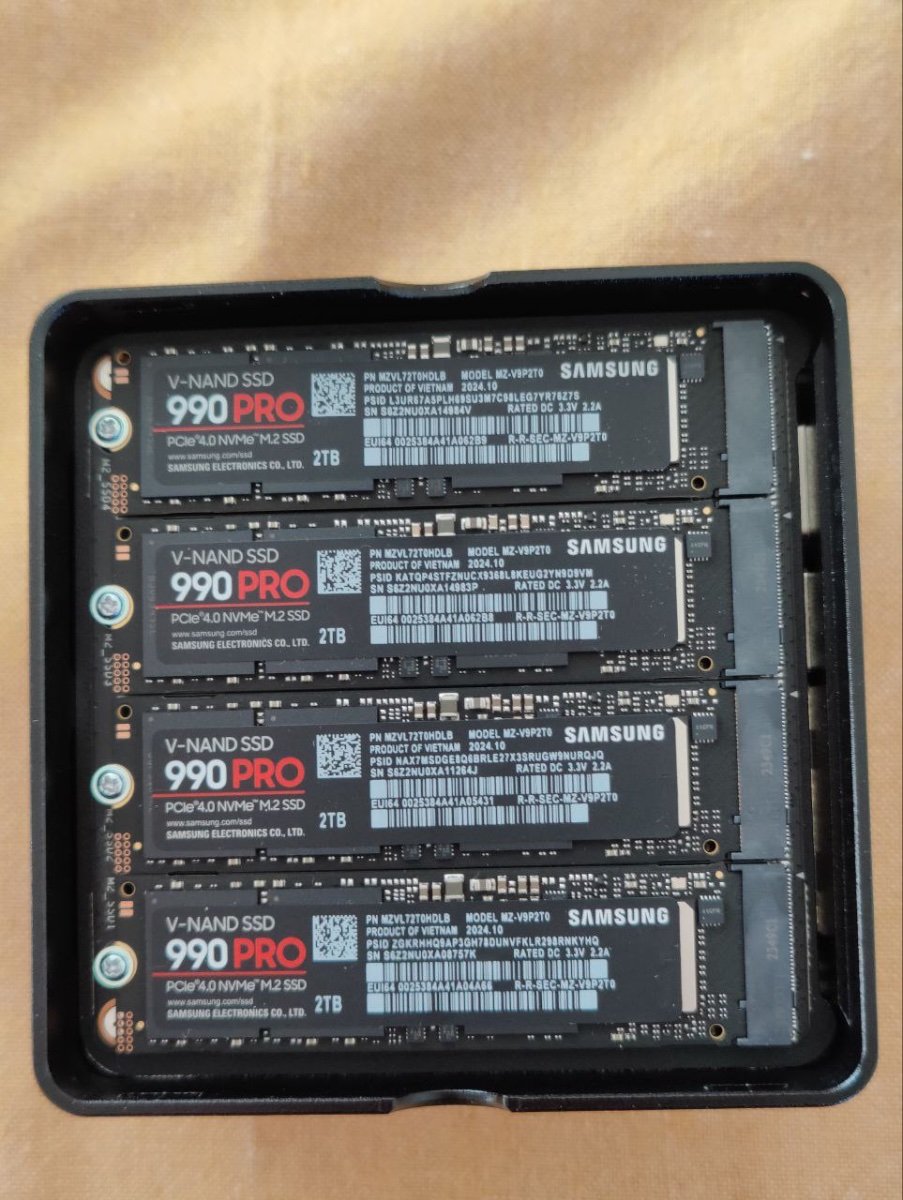
All four done 😀
-
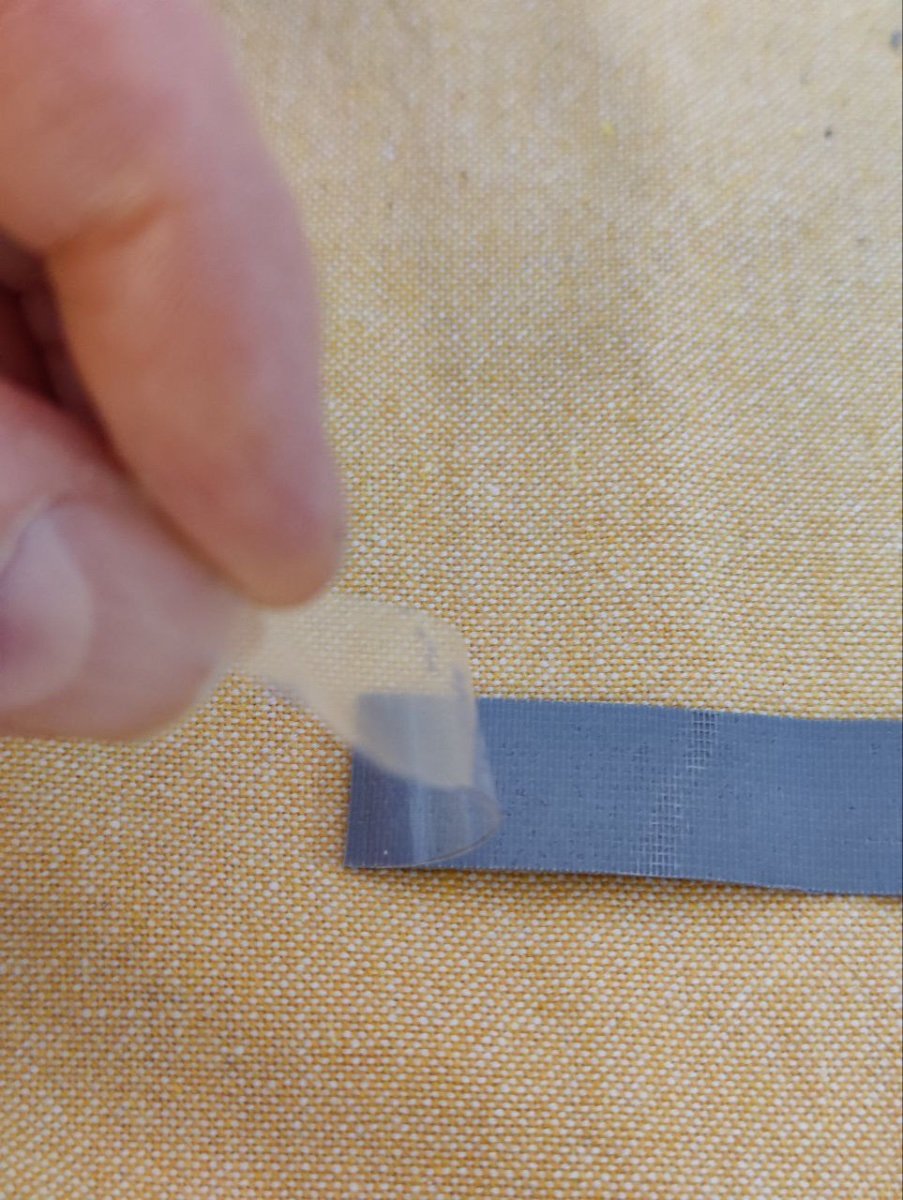
I first pulled off the transparent plastic protection. They I pressed one finger over the blue protective layer, before removing this from the sheet.
-
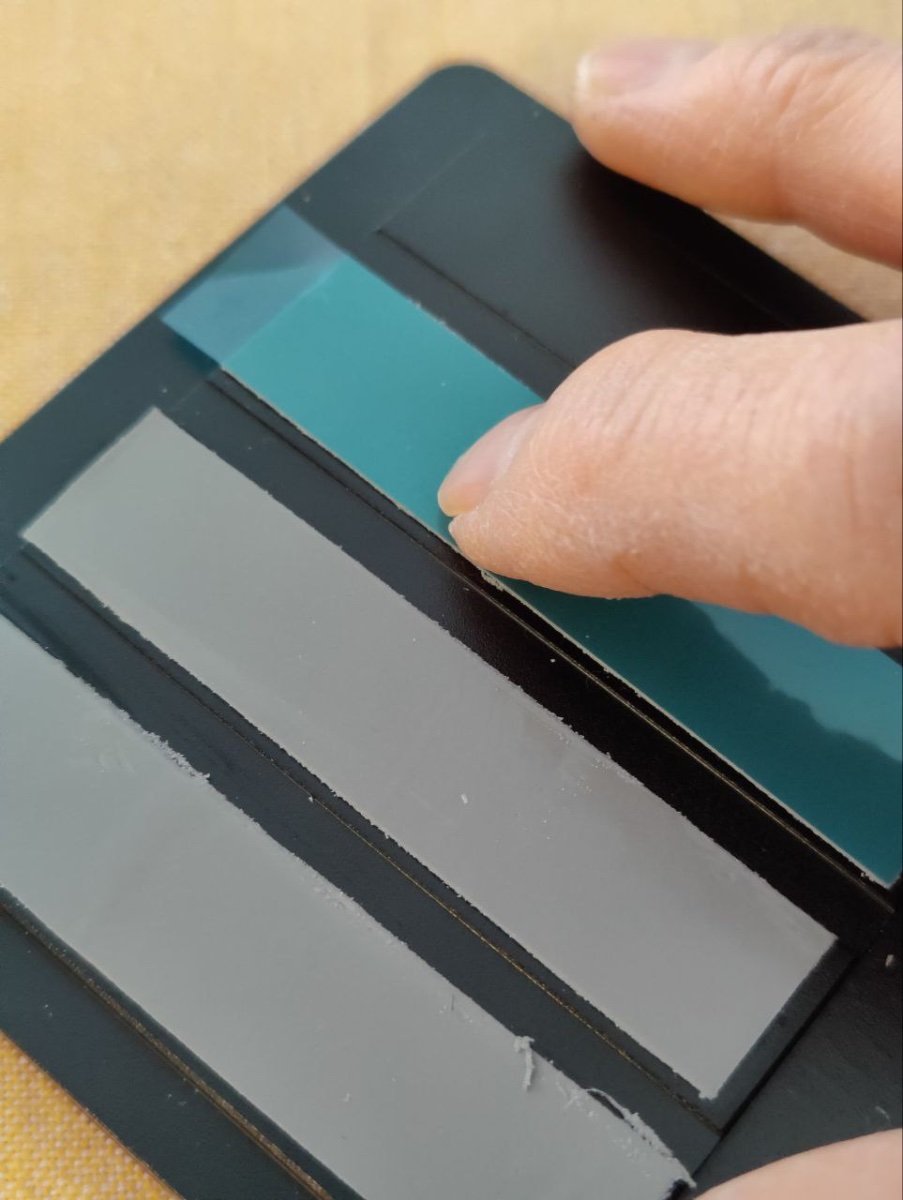
Now it’s time to attach the heatdissipating sheets to the four raised sections of the top lid, as I’ve called it, or cover maybe. They obviously meet and make contact with the four NVMe drives. I had no instructions about how to do this, so just went by feel. It looked like four sections, but they didn’t separate easily. A pair of scissors got the job done.
-
Another quick reply from Jessica Fang from ipc.net support. Seems it doesn’t really matter where I put the heatsink sheets. Then I would prefer to attach them to the inside of the lid, which would have to wait ’til later this weekend. On another note, I would like to apologize for my -sometimes - almost sharp photos. Maybe I don’t have the patience needed for this. But I will do my best in future posts, with the mobile phone camera. The alternative would be to get my old Pentax K10D digital camera with Tamron lenses out of the closet. Let’s see about that.
-
So, when the heat dissipating sheets are in place, next step would be to start up with a session of GParted to verify all my drives are in the game. That would have to wait for the Jessica Fang reply, though.
-
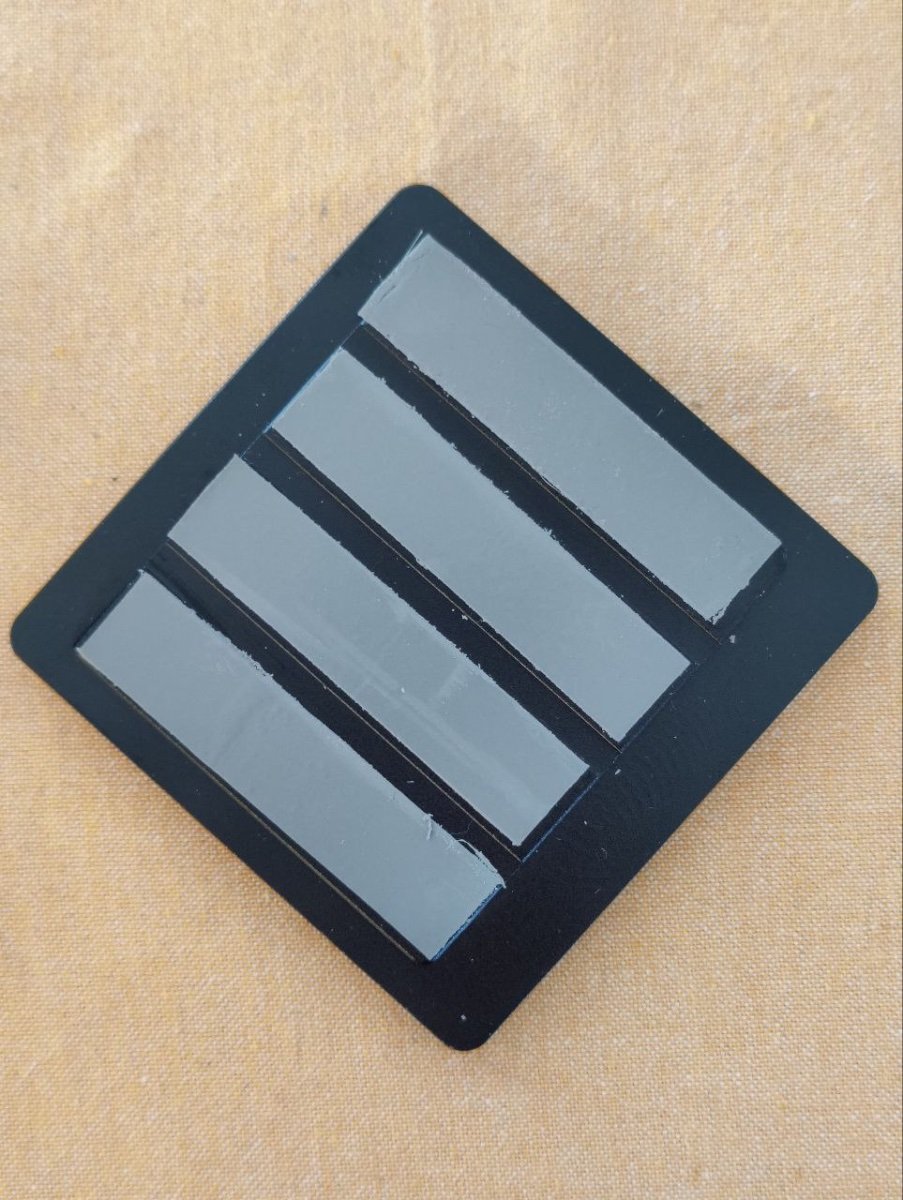
With this Pocket NAS I got four sheets of some heat dissipating kind. I’m not sure if they should be attached to the inside of the top lid, or directly on the four NVMe drives. Or if it matters at all, where…. So I sent the support team another question. This Jessica Fang with the ipc.net support has given me clear answers, all times I’ve had questions. Best so far, with this brand.
-
First one inserted, only to be screwed down. This was a quick job, compared to some of the other steps needed. The four of them all set to go. Almost.
-
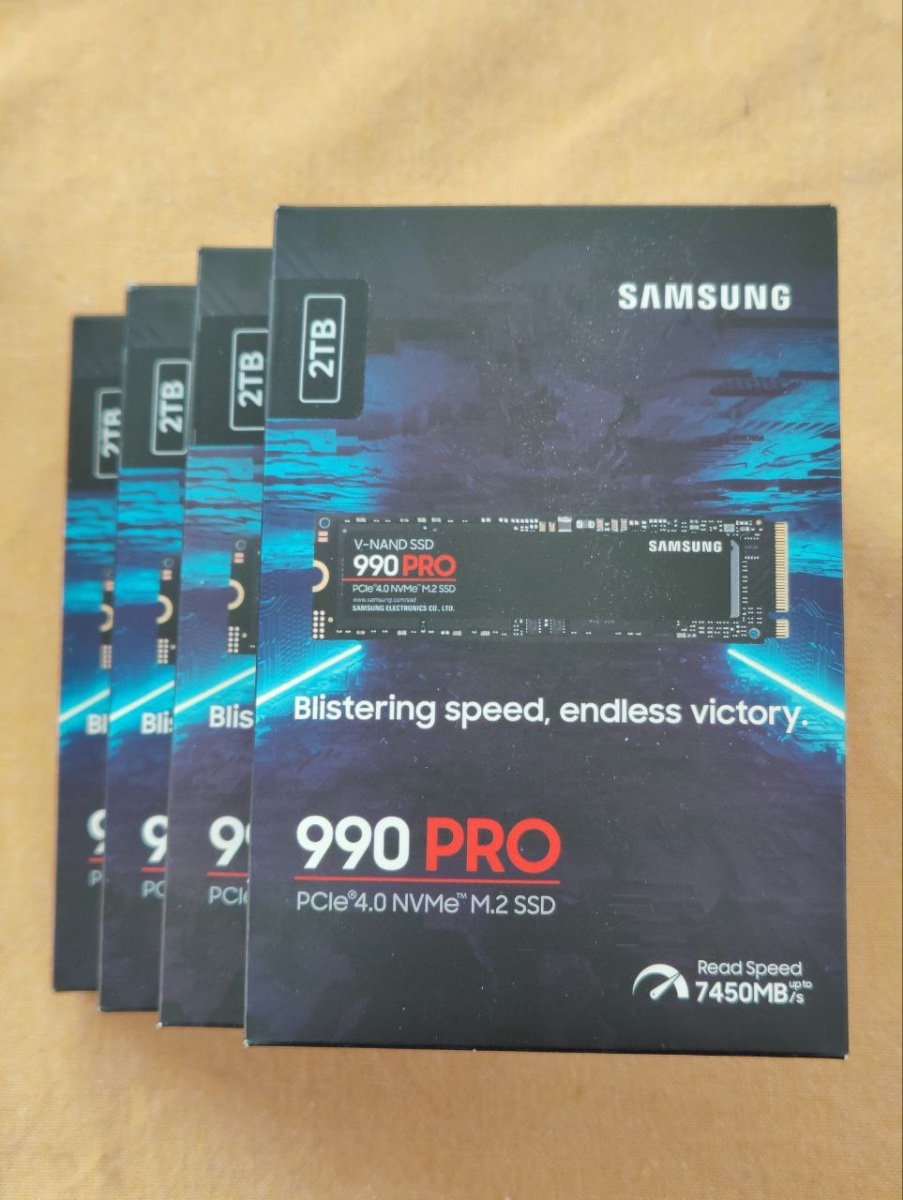
So when you can spot your destination at the horizon, you increase your pace, right. Time for S-sung storage drives to step into the picture at last.
-
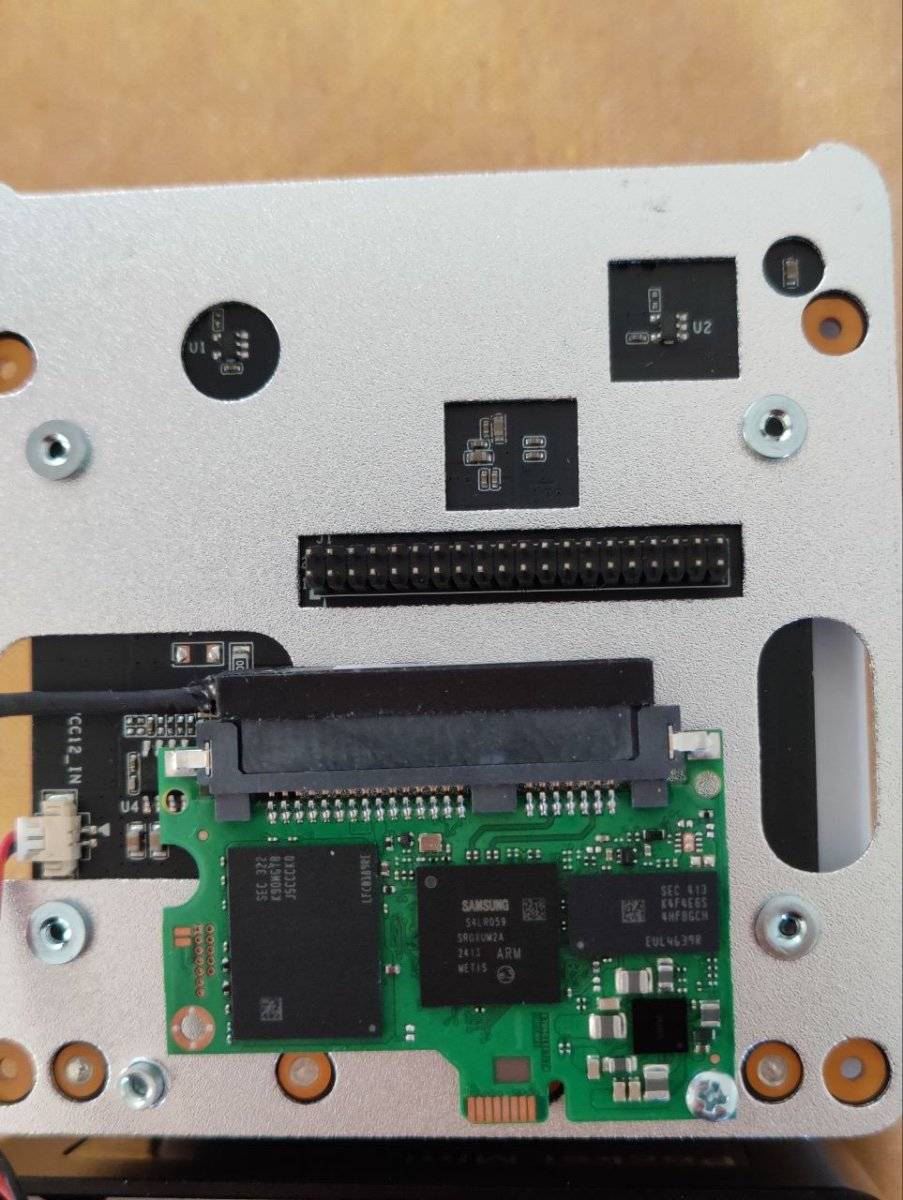
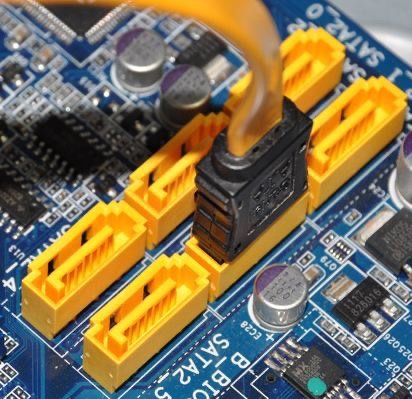
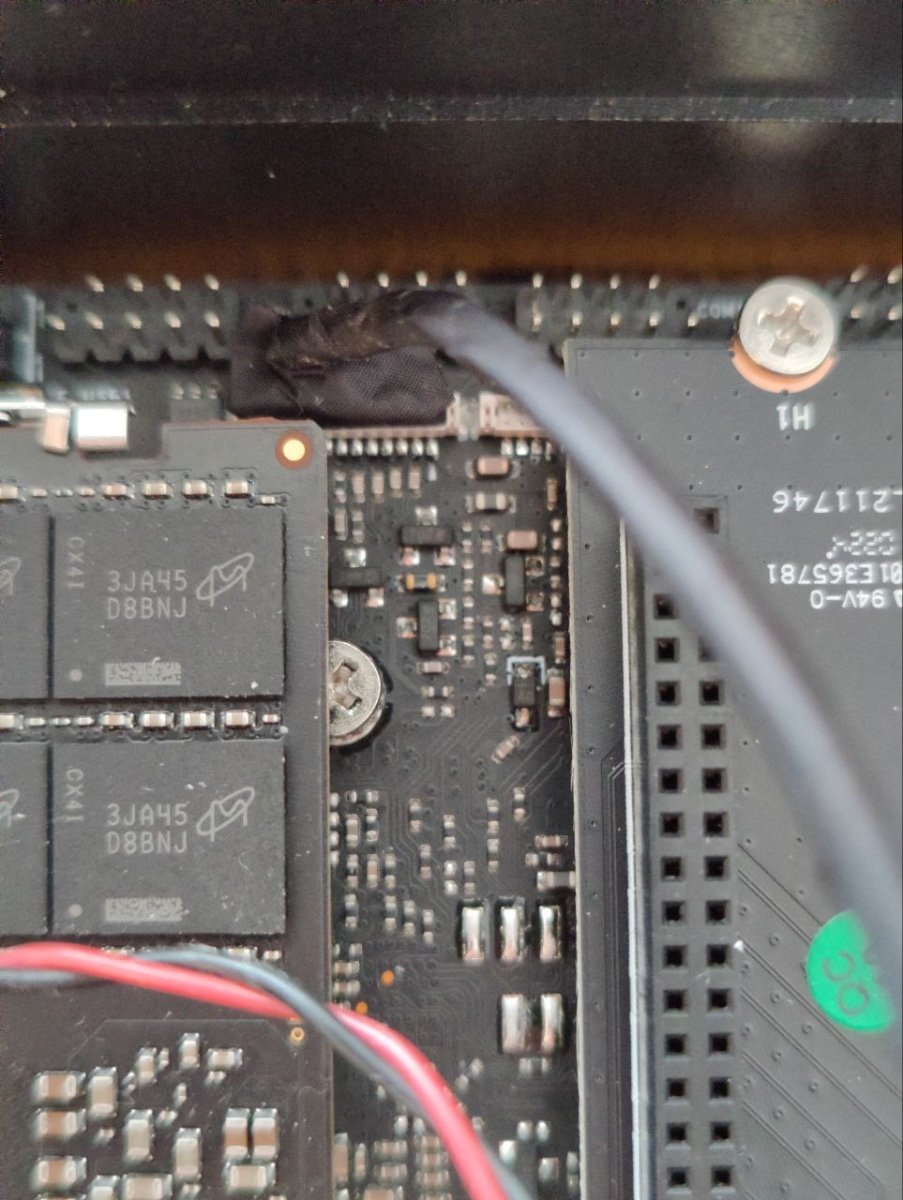
If you wonder why it’s not obvious were to connect the SATA cable from the SSD chip, to the motherboard. The small scale of everything on this motherboard, means the SATA connector isn’t like your normal one. SATA ports on regular size motherboards are familiar to everyone who has been inside a computer. Compare that to the minuscule white connector on this motherboard, and you’ll see my point.
-
Because of this flimsy connector, patience is needed when you try to attach it to the SATA connector on the motherboard, but it seems I succeeded. First time I start this Pocket NAS would reveal if it works. I can also say you should be a bit careful when trying to attach the connector pins of the metal part I screwed the SSD chip on, to the connector on the motherboard itself. I seem to have done that correctly also., because I was able to put the four screws in from the top again, and tighten them. Next step would of course be to mount the four NVMe sticks on top. That must wait a little, though. Rome wasn’t built in a day.
-
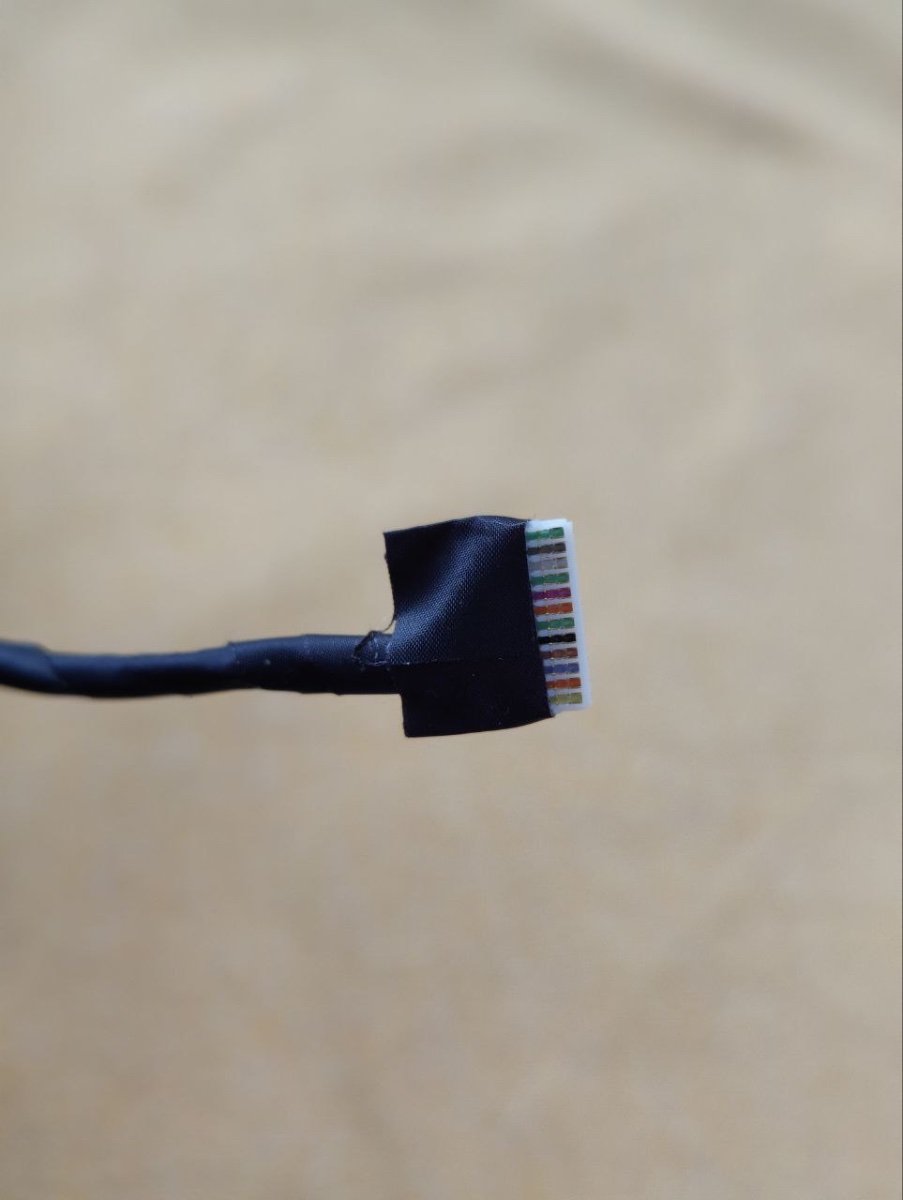
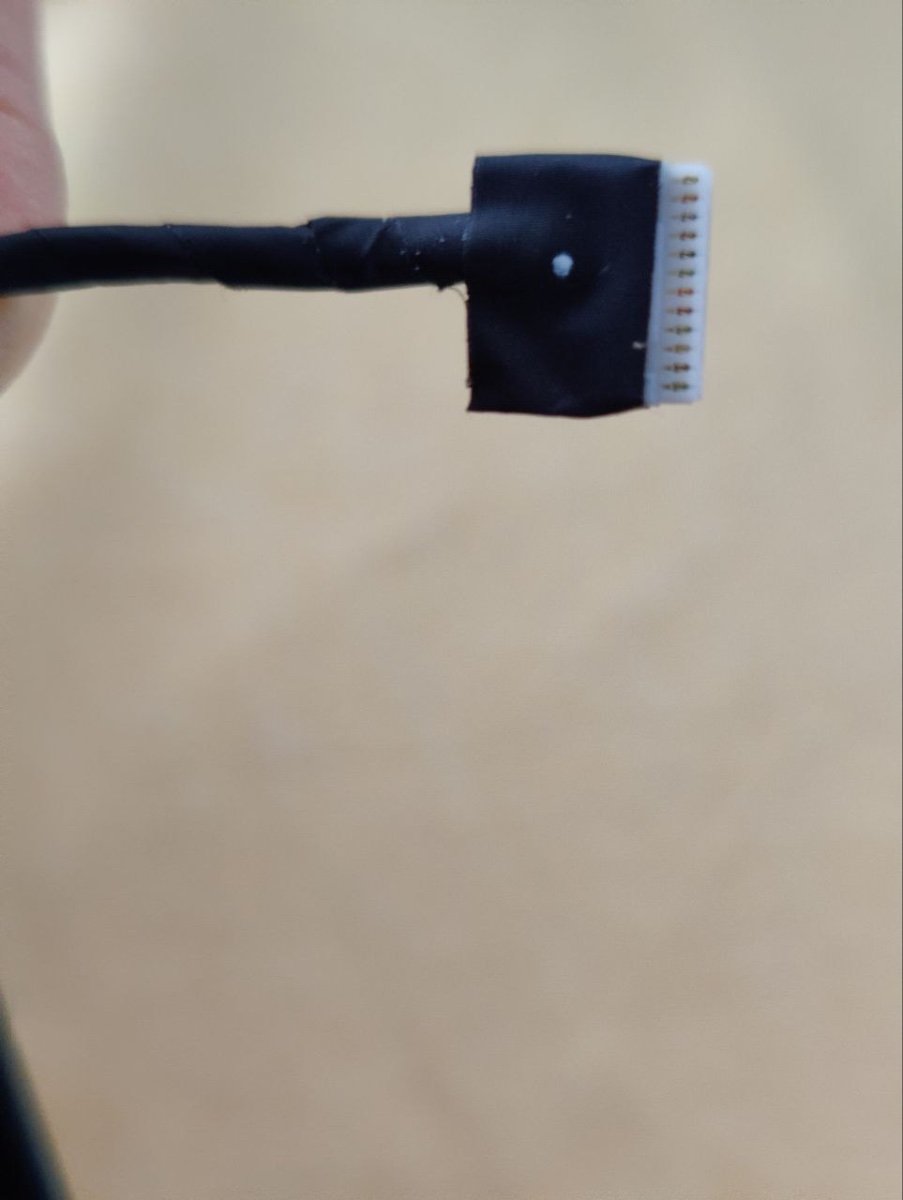
The cable connector has two sides (!). The colored side should point to the middle of the motherboard. I must tell you this cable connector is very flimsy. The white part of the connector meets like a taped over part of the cables attached to the connector. The second picture doesn’t show it properly, but it’s only like gold colored.
-
I sent a question to the ipc.net support (Jessica Fang) about where to connect the minute SATA cable connector to the motherboard. Answer back in almost no time, considering the different time zones. She sent me a link to a video in Chinese and two separate pictures. Of all this I concluded the cable should be attached to the white connector at the bottom middle part of the picture.
-
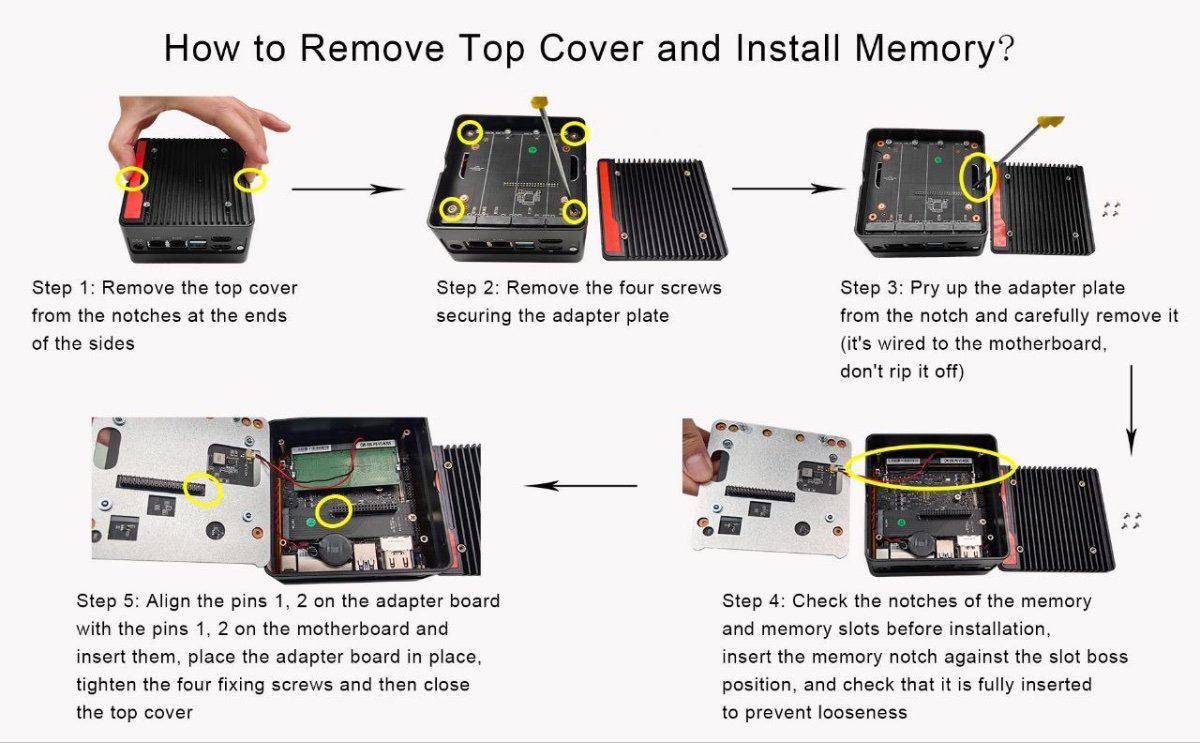
The last time I contacted the ipc.net support team, was because I believed they sent me the wrong user manual by e-mail when I purchased this mini PC/NAS. It was only motherboard related things in this manual. Nothing about how you would get to the inner part of this case. That’s why I had to send them all these questions. Seems it really was the manual intended for my Pocket NAS, They said their main products are motherboards…They at least sent me a picture of how you go about opening this case up. which we already know by now, but anyway.