All Activity
- Past hour
-
 TheBritishJarl joined the community
 -
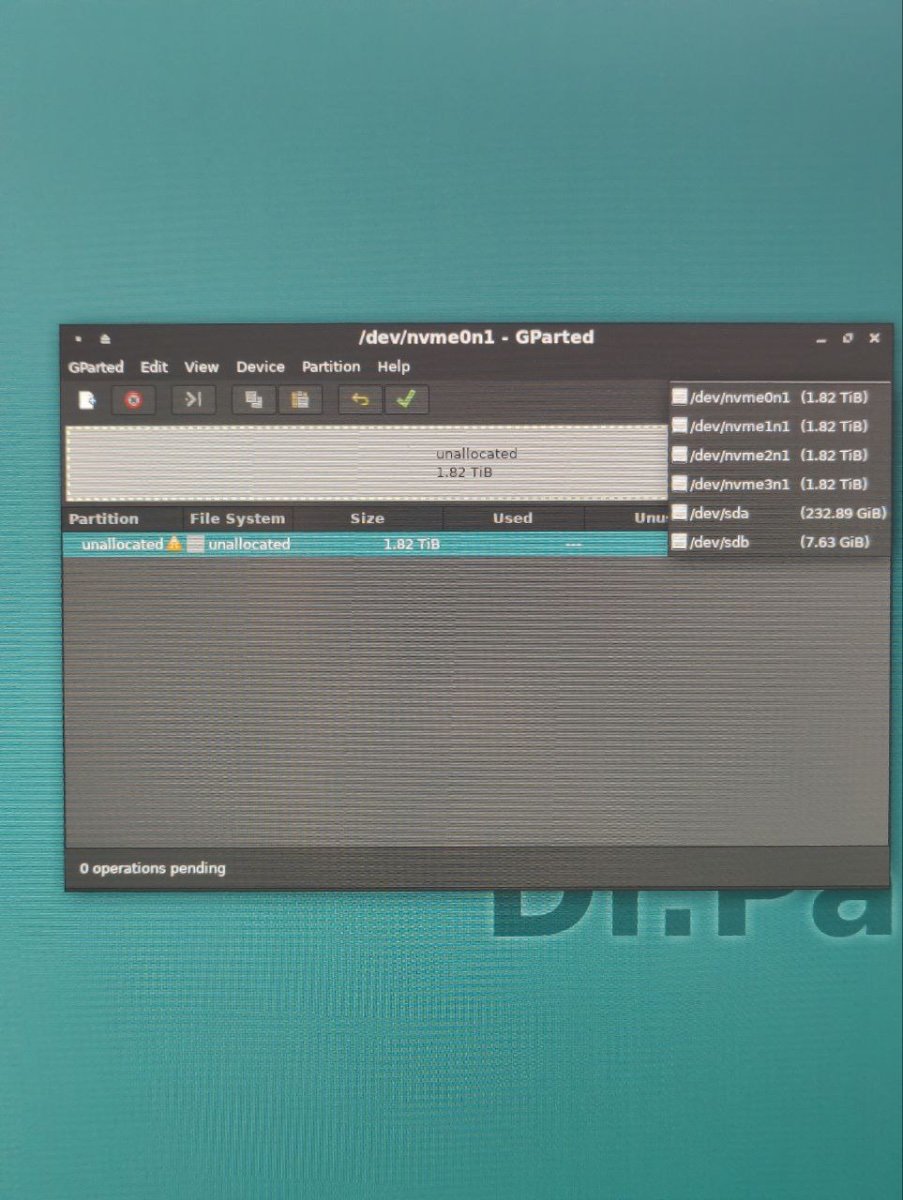
So, reality gave me a moment to verify my drives. A live session of GParted gave this result. All drives are ready for action. My four NVMe drives are there, sda is the SSD chip I installed a couple of days ago, and sdb is the USB stick with GParted. Hooray 😀

- Today
-
 craftycraft joined the community
 -
holy cow, this post has taken a weight off my shoulders. It's unbelievable how this isn't checked by default... thank you so so much OP 🙏
-
I didn’t. My pool was created with n HexOS
-
 eatapoptart joined the community
 - Yesterday
-
 Wolverinez joined the community
 -
 Papasmurf joined the community
 -
 yefiy changed their profile photo
 -
yefiy joined the community
-
 LaptopSWAT joined the community
 -
 garfire joined the community
 -
 Maquin joined the community
 -
-
I know this issue occurs when a pool is created via Truenas. Did one of you created a pool via Truenas?
-
 Tallmonster2 changed their profile photo
 -
Looking for an answer to the same problem here as well, although it's 5-10 seconds before it shows install again for me (and notifications says it was installed but still isn't)
-
This is a really good advice!. It will prevent data loss in the future.
-
Nice! I expect that it will be delivered soon. After confirming my address it was delivered in a couple of days. I think you will like this device very much!
-
When this Pocket NAS is ready for duty I intend to put it on four damping feet, to gain some extra height for more air to pass under the aluminium box. This to further help in heat dissipation. And they are so inconspicuous, as to be almost invisible, right 😉 Another reason is, I want to reduce potential vibration noice from the hidden fan inside, if that would rev up. These feet I borrowed from my HiFi nerd side, they are used for like CD-players or other ”boxes”with a weight between 2-5 kg. The green color is specific for this weight. My Pocket NAS is about 1,2 kg, but this would have to do. Now I must take a little break from this project for a couple of days. Over and out.
-
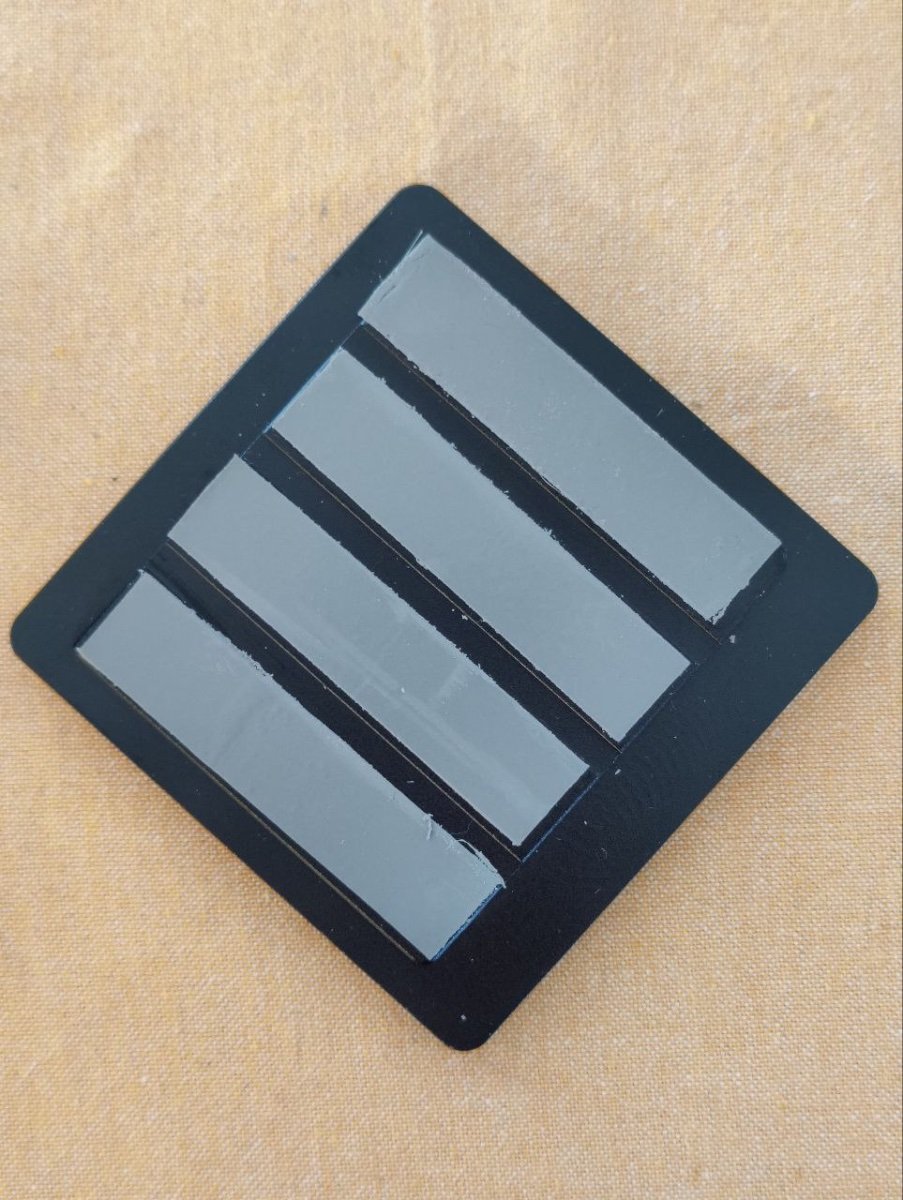
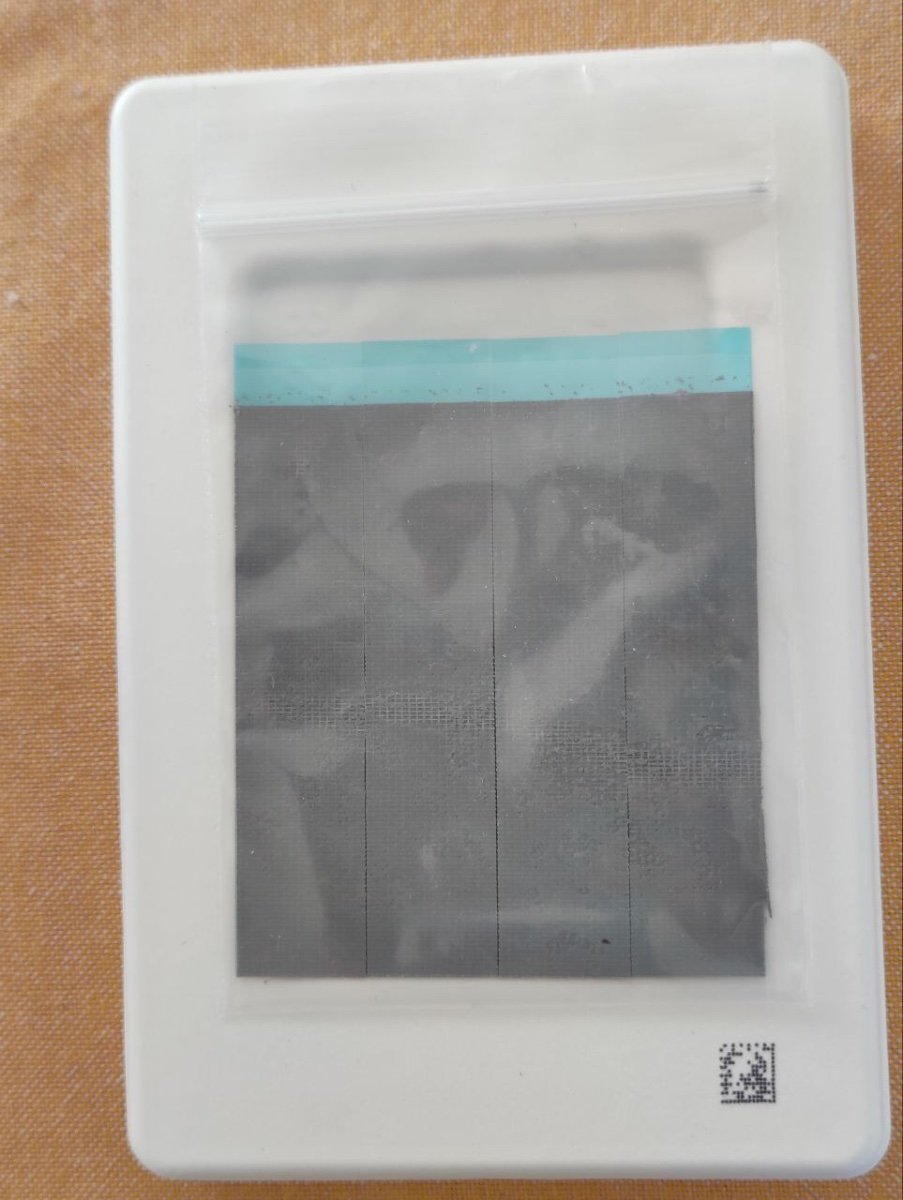
All four done 😀
-
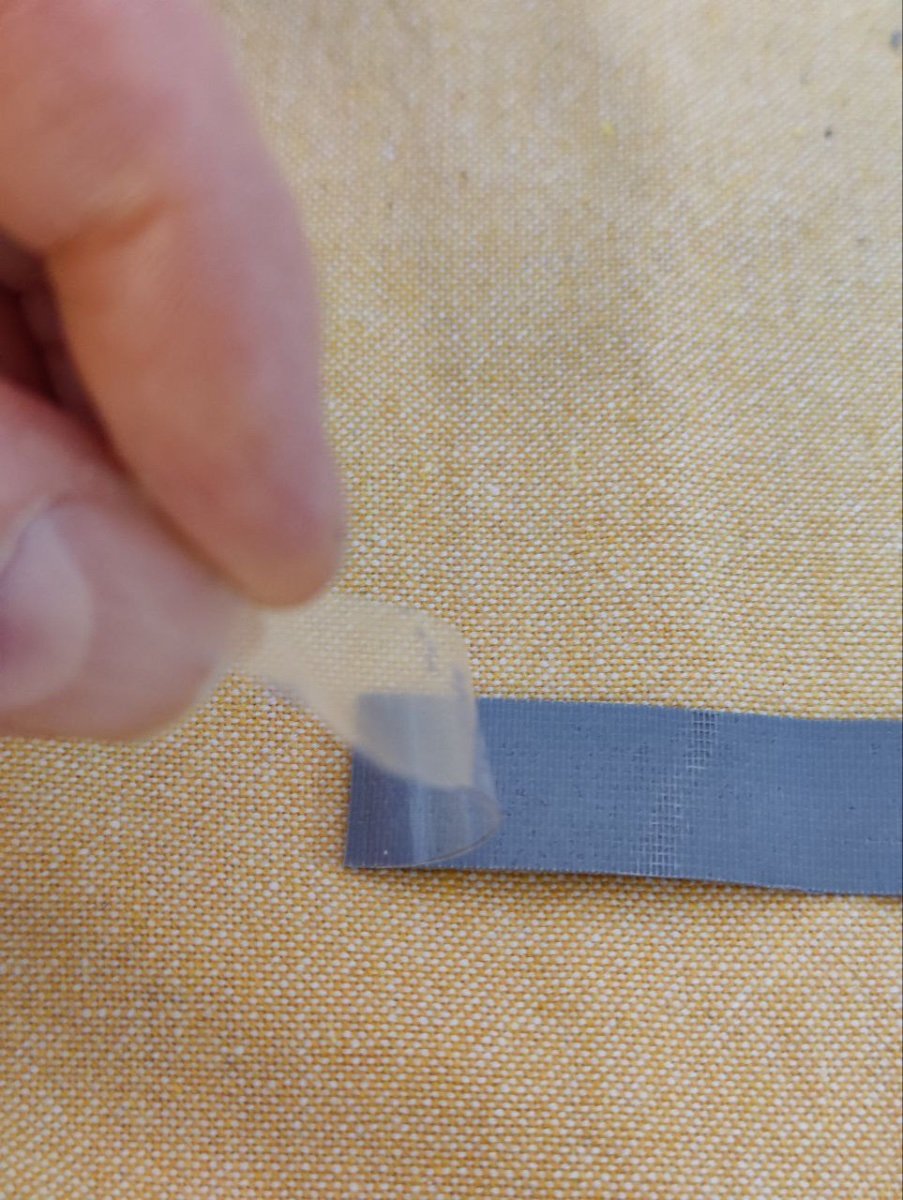
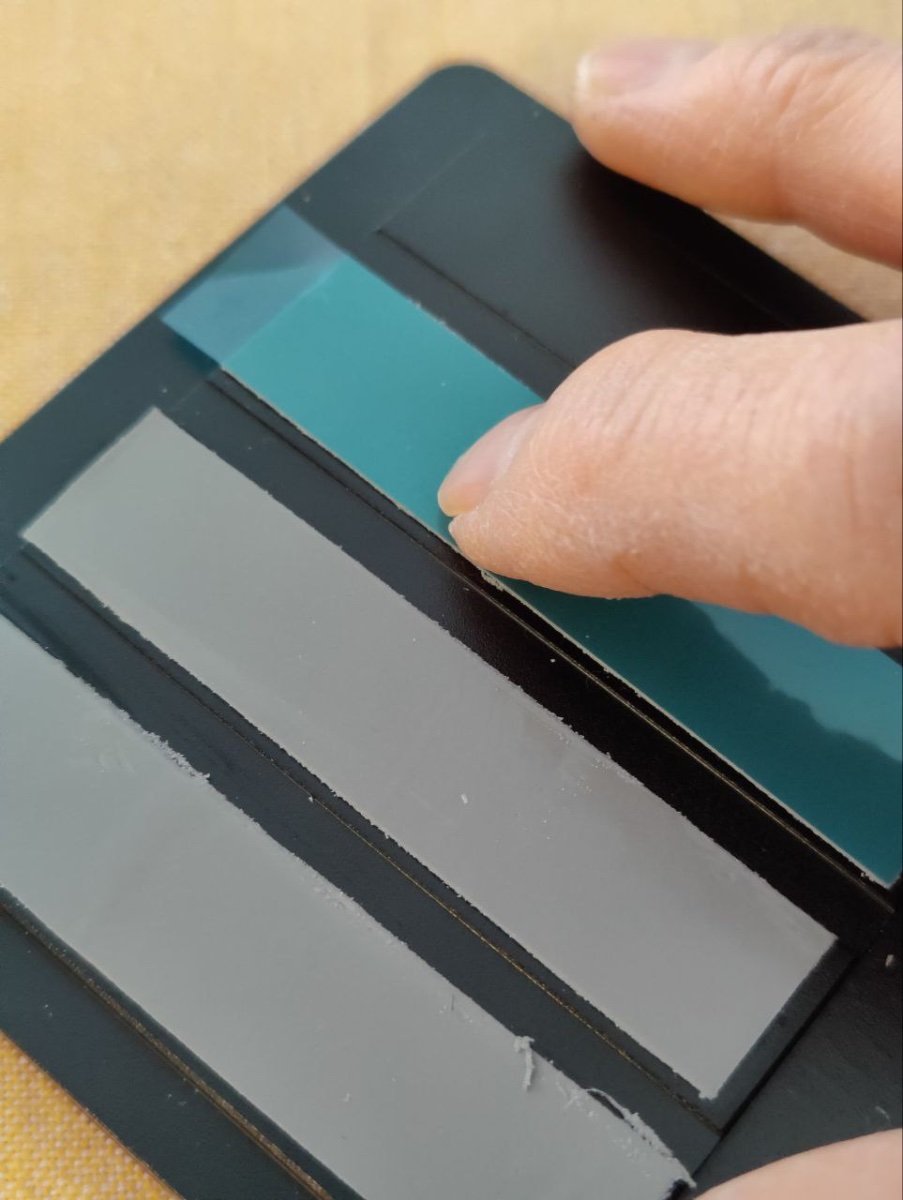
I first pulled off the transparent plastic protection. They I pressed one finger over the blue protective layer, before removing this from the sheet.
-
Now it’s time to attach the heatdissipating sheets to the four raised sections of the top lid, as I’ve called it, or cover maybe. They obviously meet and make contact with the four NVMe drives. I had no instructions about how to do this, so just went by feel. It looked like four sections, but they didn’t separate easily. A pair of scissors got the job done.
-
I think I would use 1 VM for all dockers, especially since you are a bit limited with the memory. I don't see a big advantage of splitting it in your case. Maybe you could split it in a system critical VM (running Opnsense, PiHole, Unbound, NPM etc.) and a 2. One running apps which you can play with and where there is no real impact to the network if it goes down?
-
I only did a late pledge after you posted about it in here, but I already had an email to confirm my address before shipment, which I didn't saw because it was in the spam folder. Should arrive in a couple of days, now I need to wait for them to finally sell it publicly, because I really really want this power on/off addon 🙂
-
Just to be save, mark down which drive is connected to which adapter, since Hexos is identify the adapter and not the drive behind it, it could lead to problems when you switch the drives and adapters around.
-
it was the first time for me. I came back to it later and tried again and now they've appeared. Not sure what changed but it's working now.
-
Update: that was the problem, thanks guys. Would never have got there on my own.
-
+1 This fixed my issue too! I could not stream my movies over my local network, they would all go over the plex relay capped at 2mbps with horrible quality and buffering (verified by losing access to my library in the plex app when I turned the relay feature off in the plex network settings). I wasted so much time digging through the settings in my Apple TV app trying to see where I could give it my server's IP address directly. Once I flipped this Host Network switch in the TruNas interface, my movies play without issue (presumably over my local network). Bonus, I also found the setting to take advantage of my server's GPU here as well:)
- Last week
-
@fckiagged and @Woggie, is this the first time you run the setup of Plex and Immich in Hexos? Or did you run the setup before and did you delete the Plex and Immich app in HexOs?
-
yeah same for me for both.
-

What Apps Would we want to see Supported?
thepalerider replied to Sam of Ham's topic in Applications
Macrium Site Manager -
thepalerider changed their profile photo
-
+1 fixed my issue, had to spend a few hours debugging Noting a bit more details on where to change host network setting TrueNas scale -> Apps tab on left column -> double press plex icon -> Edit on top right -> Network configuration on right filter -> Host Network checkbox
-
Another quick reply from Jessica Fang from ipc.net support. Seems it doesn’t really matter where I put the heatsink sheets. Then I would prefer to attach them to the inside of the lid, which would have to wait ’til later this weekend. On another note, I would like to apologize for my -sometimes - almost sharp photos. Maybe I don’t have the patience needed for this. But I will do my best in future posts, with the mobile phone camera. The alternative would be to get my old Pentax K10D digital camera with Tamron lenses out of the closet. Let’s see about that.
-
 ShinobiRen changed their profile photo
 -

Minecraft/Plex/Conan Exiles/General Data Backup
OnoSendaiOD replied to OnoSendaiOD's topic in Applications
Thanks for that feedback its very helpful. I will dive into the research and hope to get it up and running by May. Will be switching to a 128 boot drive. Big thank you for pointing me in the right direction. -
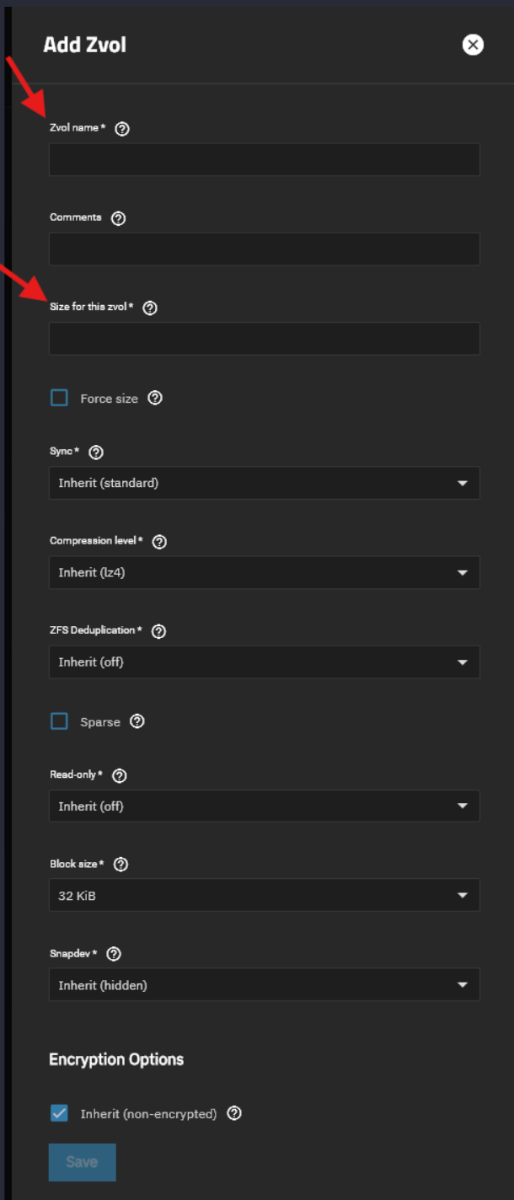
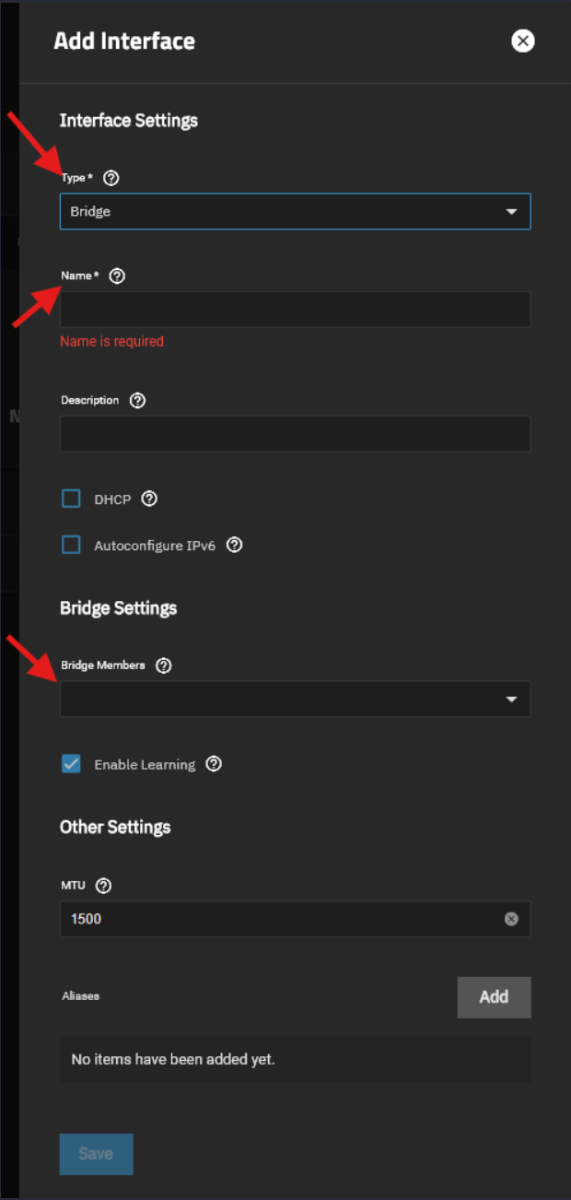
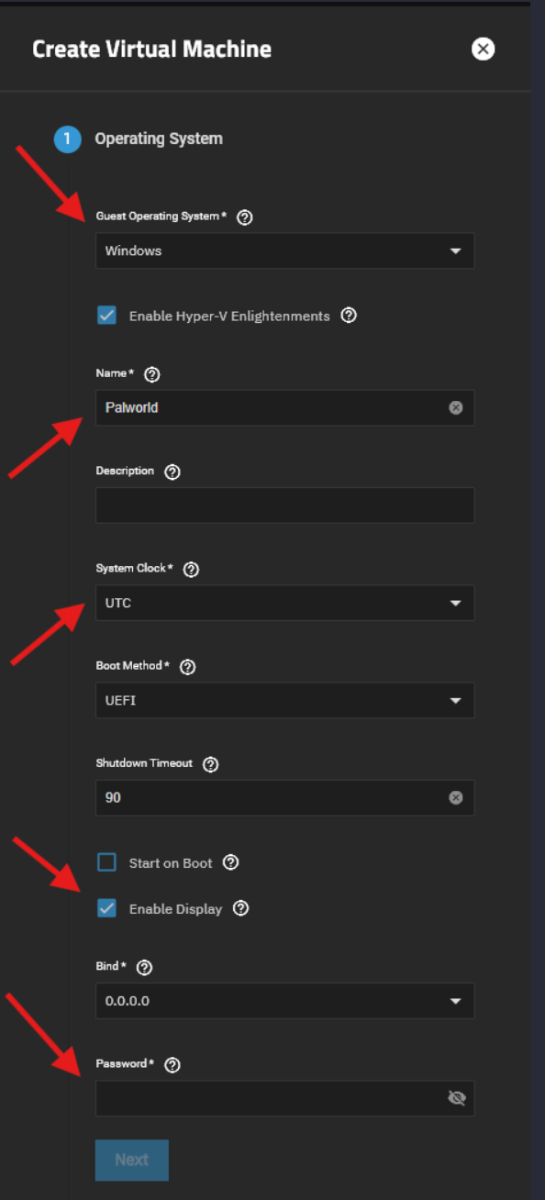
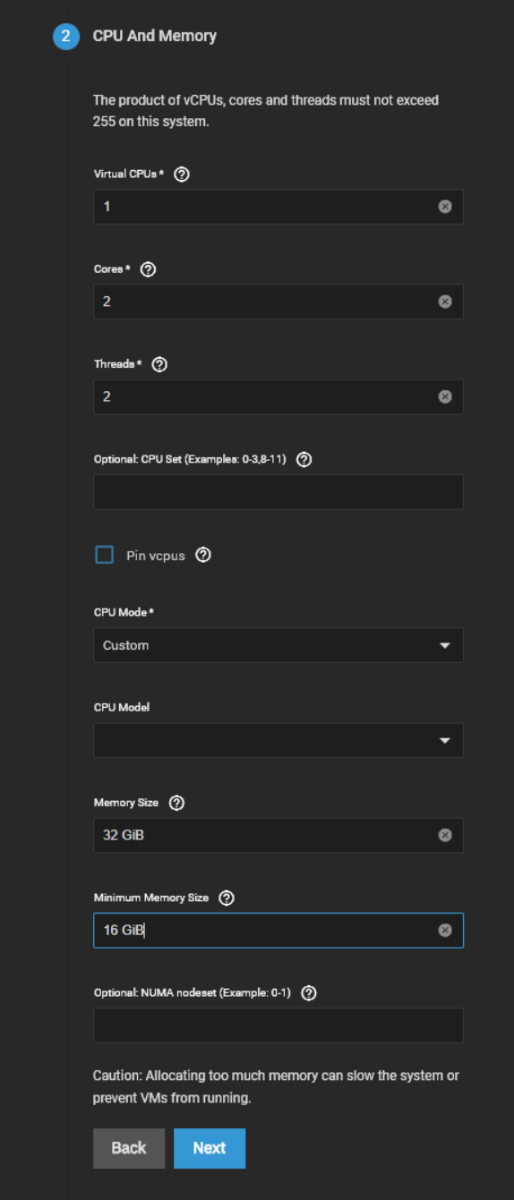
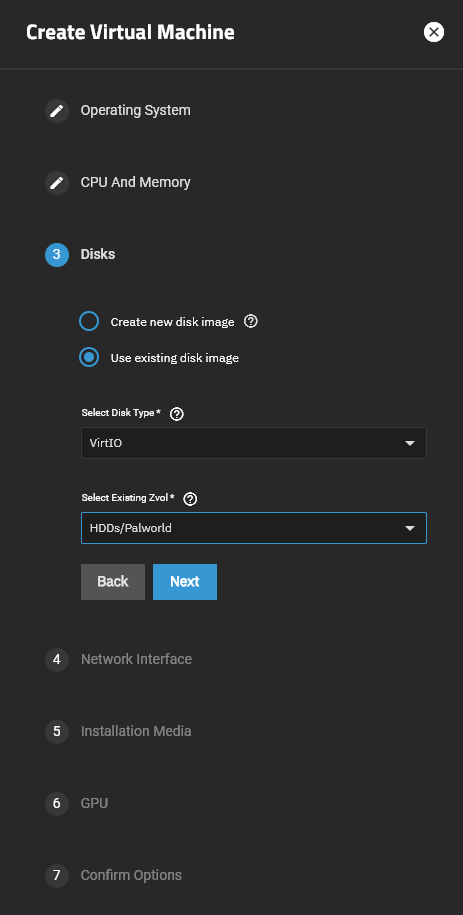
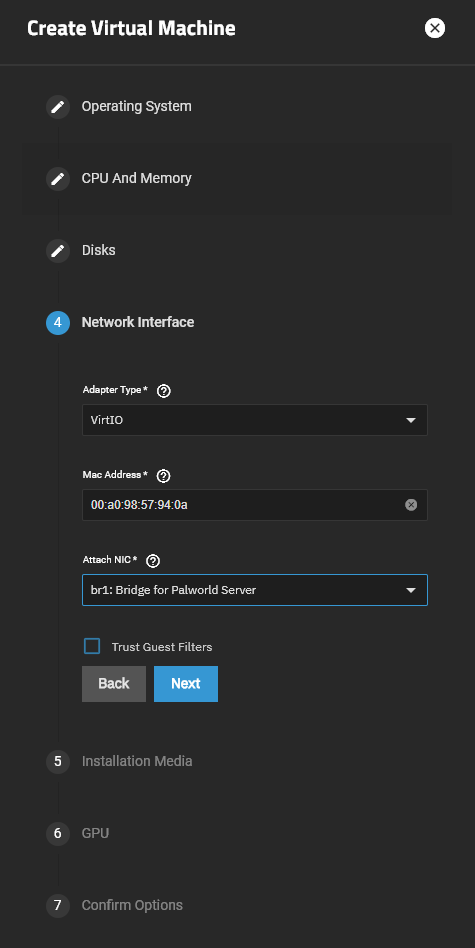
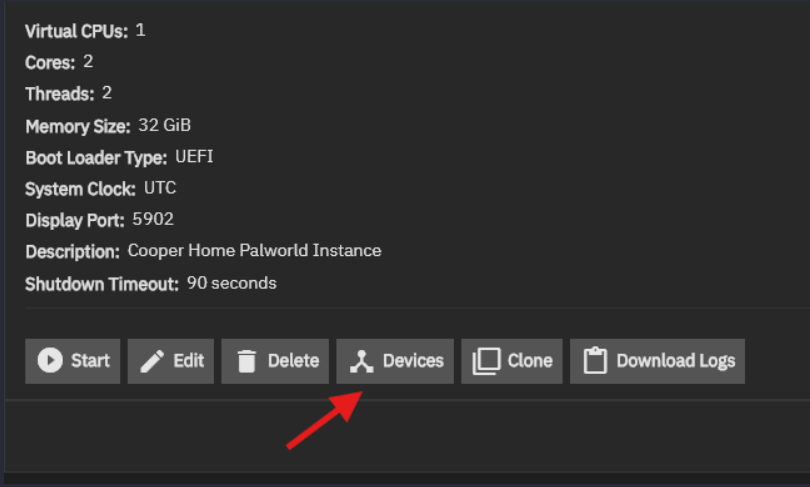
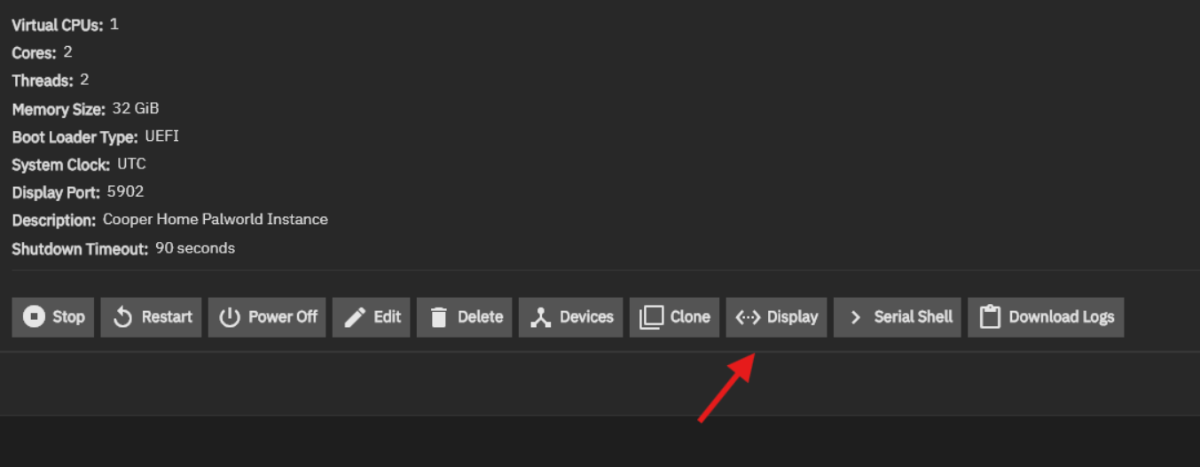
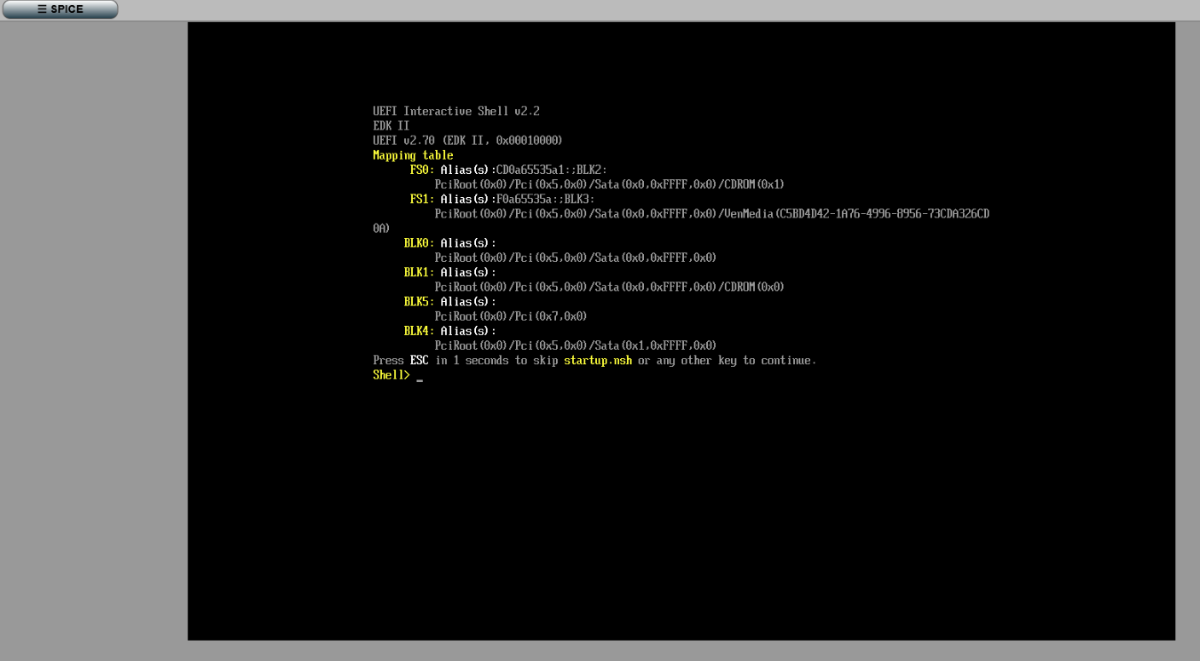
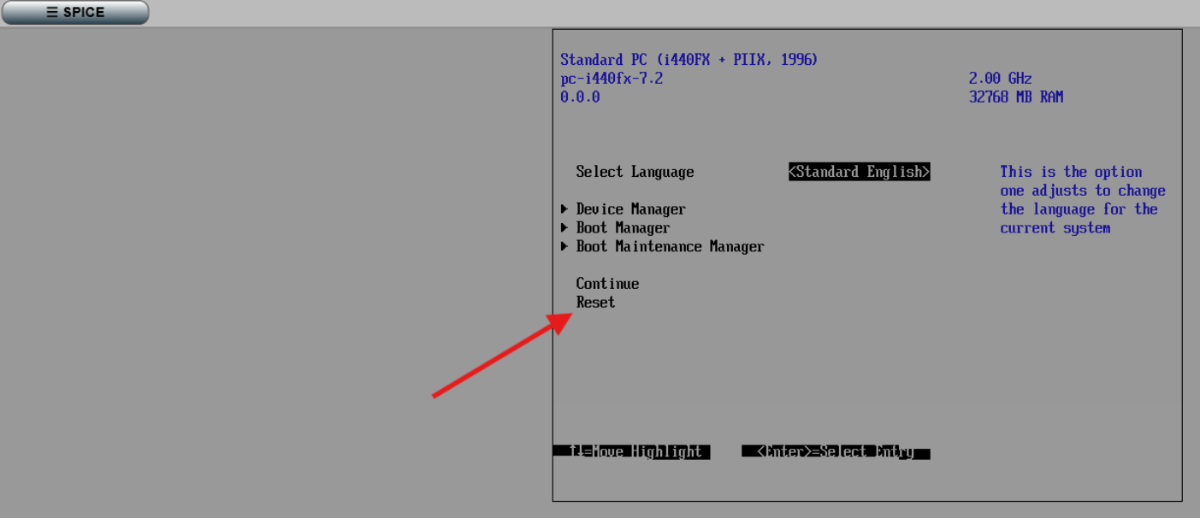
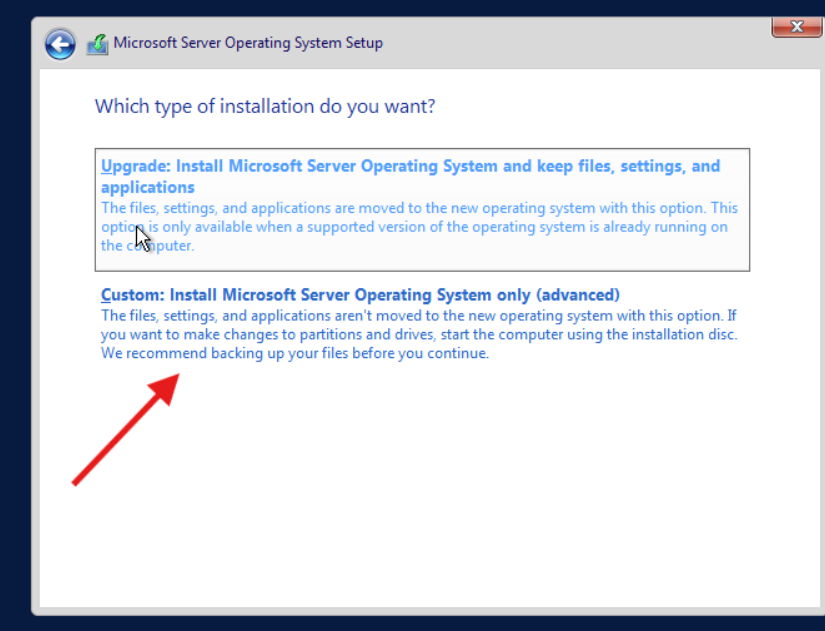
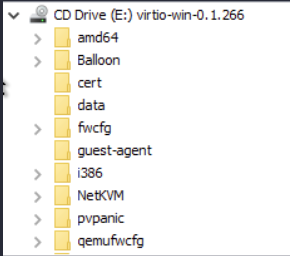
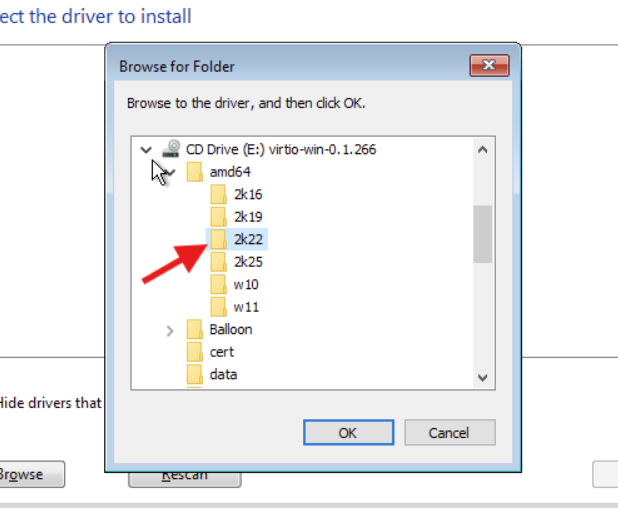
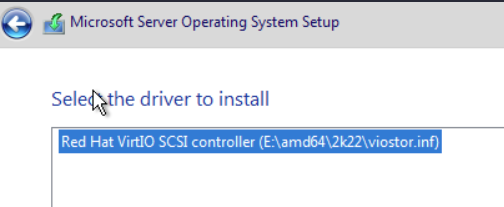
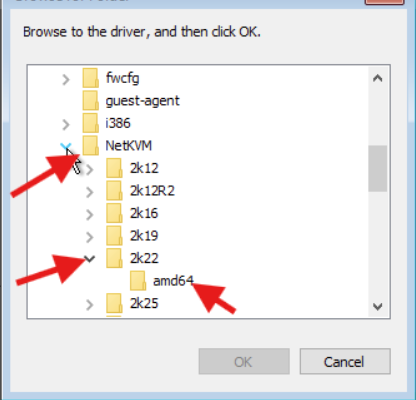
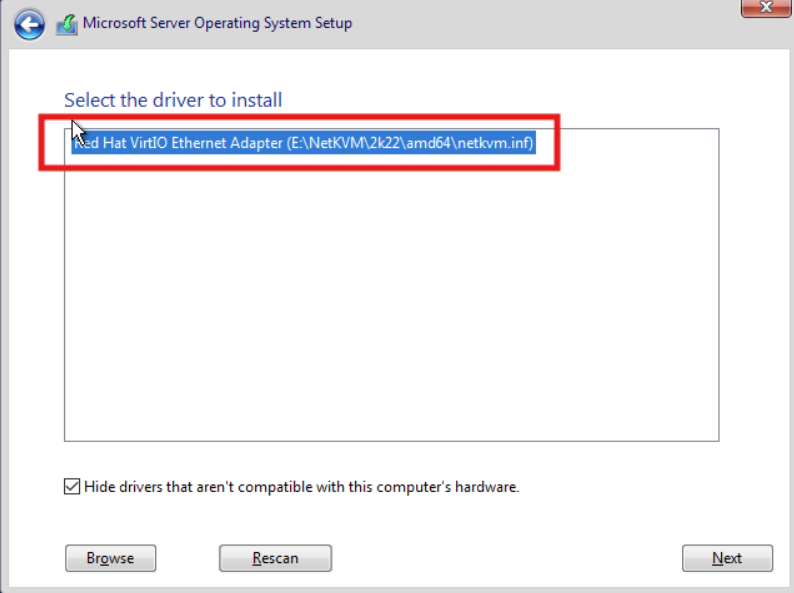
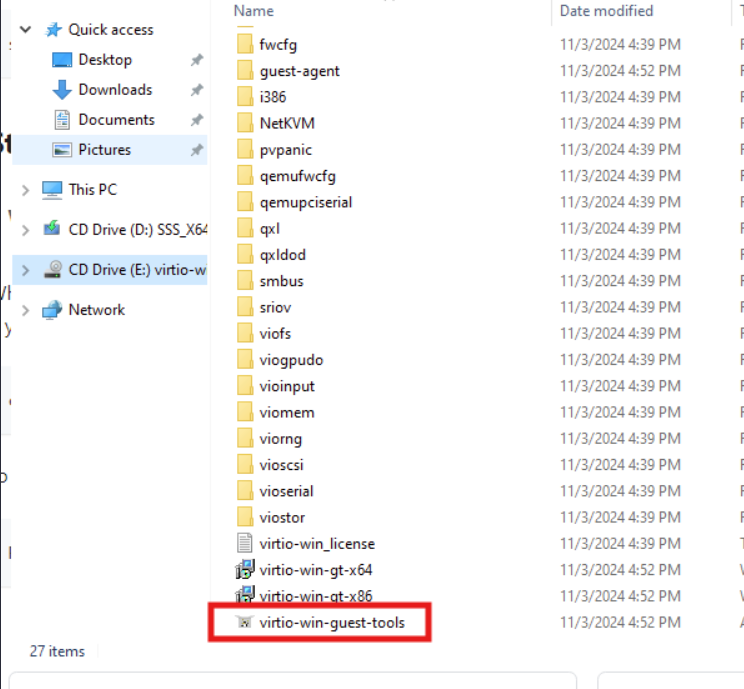
Creating a Palworld server in TrueNAS VMs I wanted to write this out in case anyone else came across the need for a Windows Server install and couldn't find a resource for it. I pieced this together from several guides and just pushing buttons. Create the virtual disk Navigate to the TrueNAS admin page Navigate to Datasets Click Add Zvol Insert the Name, Comments (optional), and Size Navigate to Network Click Add Create a bridge for the VM to use (images to come later) In Bridge Members select your interface (eno1). Navigate to virtualization Pre-req: have your ISO loaded into a store that libvirt-qemu has full access to NOTE: If you don't allow this to have full access the VM creation will fail as it needs the ISO access to install the guest operating system. Have the virtio drivers needed to show up the disk to install in Windows. The drivers can be found here: https://github.com/virtio-win/virtio-win-pkg-scripts/blob/master/README.md - the stable build. Configure the VM with the following options: Leave Enable Display checked so you can login to it via Spice - it will not have networking when it starts. I gave it 2 cores, 4 threads because everything I could find on the internet said it needed that, and 32 GiB of RAM with 16 GiB as the minimum. Select the disk you created Select the bridge you created Select your installation media -we will add the VirtIO ISO later. I left Ensure Display Device checked - was unsure if needed it or not but left it there. Before booting click on the VM and select Devices Select Add in the top right corner and add a CD-ROM device and set the device order to lower than everything else (1003 for me). Boot the machine and connect with Spice. NOTE: If you miss the prompt to boot from CD you will have this screen here: Simply type Exit and it will drop you into a BIOs page. Select reset and then press your keyboard to boot from CD Navigate through startup until you get to disk selection, select Install Windows Only. You will notice on the next screen it cannot detect a disk - this is where the virtIO ISO comes into play. Steps below. Let it do it's initial setup of what it thinks you need. You will need to be selective otherwise it will hang. Below are the drivers I chose to install: Click Browse on the next screen Find your virtIO ISO and expand it. Expand amd64 and select 2k22 from the options. The listed driver should appear there now: Install the driver and the disk will appear. Next, we will install the network driver as well. Same steps as before, Load driver, navigate to the ISO, then select this option: All other drivers we can install with the guest tools from the ISO inside of the guest OS. Continue with the Windows installer. Select the empty disk for it to install it's files to. Once booted into the OS follow these steps: Navigate to the CD that has your virtIO ISO on it and double click on this file: Let it run. It will take a LONG TIME to install everything and will require you to interact with it somewhat. Reboot the server (Other:Unplanned) Install the Palworld dedicated server via SteamCMD located here: https://docs.palworldgame.com/getting-started/deploy-dedicated-server/ I hope this helps anyone else that might have been struggling with it. Massive shoutout to @Mobius for pointing out all my images were broken on my first post - finally figured it out!
-
- 2
-

-